|
<< Click to Display Table of Contents >> Radio Button Options |
  
|
|
<< Click to Display Table of Contents >> Radio Button Options |
|
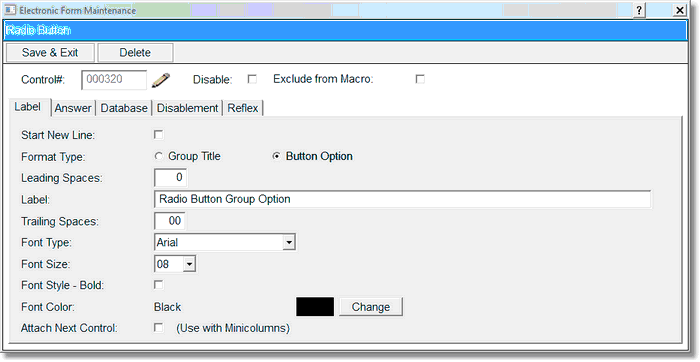
1.Select New Control.
2.Select Radio Buttons.
3.Select Disable if the Radio Button is to be inactive on the electronic form but is not to be deleted from the setup. A disabled control will have an asterisk (*) appear next to the control number on the Electronic Form Maintenance display.
4.Select Start New Line to display the answer on a new line of the Electronic Form.
5.In the Format Type field, select Button Option.
6.Enter the appropriate number of spaces before the radio button label by selecting Leading Spaces.
7.Select the Label field and enter the answer as it is to appear on the Electronic Form.
8.Enter the appropriate number of spaces to appear after the label in the Trailing Spaces field.
9.Select the font type in the Font Type field.
10.Select the font size in the Font Size field.
11.Select Font Style – Bold if the font will display in bold.
12.Select Font Color if the default font color is to be changed.
13.Select the Answer Tab.
14.Value: A value may be entered if the value is different than the Label.
15.Title: Enter a title which will appear in Changes Detail on the patient's Electronic Form.
16.The Narrative Code, and Narrative Value fields are no longer used.
17.Default: If the default field is selected, this will be the answer that appears on the form when it is selected on a patient.
Select Electronic Form Maintenance > Electronic Form > New Control > Radio Button Option > Answer
Radio Button Answer
18.The Database code is selected on the Radio button Group Title only.
19.See the Enablement or Disablement for more information on the Disablement tab.
20.For reflexing instructions please see the Reflexing chapter.
21.Select Save & Exit to save the information, or select Delete to exit without saving.