|
<< Click to Display Table of Contents >> Radio Button Group Titles |
  
|
|
<< Click to Display Table of Contents >> Radio Button Group Titles |
|
1.Select New Control.
2.Select Radio Buttons.
3.Select Disable if the Radio Button is to be inactive on the electronic form but is not to be deleted from the setup. A disabled control will have an asterisk (*) appear next to the control number on the Electronic Form Maintenance display. When the form is previewed, the radio button will not appear on the screen.
4.If the question is to begin on a new line of the Electronic Form, select the field Start New Line or leave blank to continue on the same line of the Electronic Form.
5.To set the question for the Radio Button option, in the Format Type field, select Group Title.
NOTE: Radio buttons must have a group title in order to save and print correctly.
6.Enter the number of leading spaces, if applicable, in the Leading Spaces field. This will be the number of spaces desired before the words in the Label Field are displayed on the form.
7.Enter the text in the Label field.
8.Enter the appropriate number of spaces in the Trailing Spaces field. This will be the number of spaces desired after the words in the Label Field.
9.Select the font type in the Font Type field.
10.Select the font size in the Font Size field.
11.Select Font Style – Bold if the font will display in bold.
12.Select Font Color if the default font color is to be changed.
13.Select Attach Next Control if using the Mini-Columns Layout to force the next control to stay in the current column.
Select Electronic Form Maintenance > Electronic Form > New Control > Radio Button Group Title
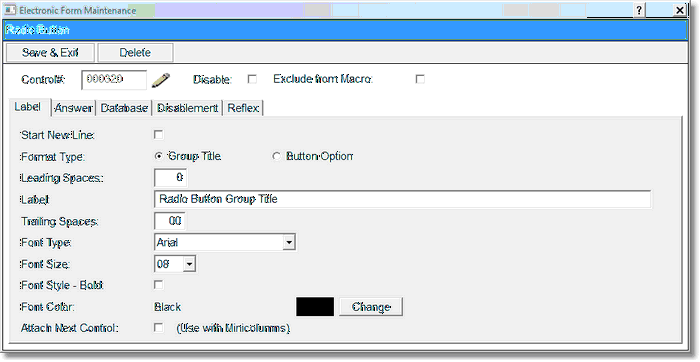
Radio Button Group Title
14.Select the Answer tab.
15.The wording placed in the Title field will display in the Changes/Detail screen on the patient's form and also on the Required/Warning Only Popup Screen so that the user will know which question to address.
16.If Required is selected for the control, the user will not be able to go to another page, print, lock or exit the form without addressing the appropriate field(s). If Warning Only is selected, the user is given a prompt that this question should be addressed on the form, but TruBridge EHR will allow going to the next page, printing, locking, or exiting the form without addressing the field.
NOTE: Currently, if the form is a multiple page form and all pages are not accessed, TruBridge EHR will not prompt the user that there are required or warning only controls set up on pages that are not accessed. However, if the user does access the other pages, the appropriate prompts will display.
Select Electronic Form Maintenance > Electronic Form > New Control > Radio Button Group > Answer
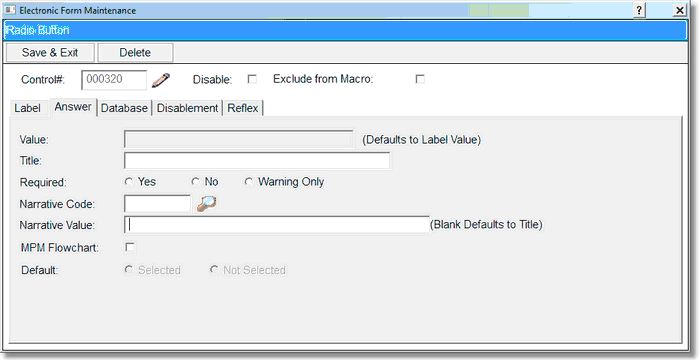
Radio Button Group Title Answer
The Narrative Code, Narrative Value, and MPM Flowchart fields are no longer used.
17.Select the tab marked Database.
18.Select the magnifying glass that is beside the Database Code field to add a database code to the field. Multi-application codes cannot be used with Radio Buttons.
19.Select the Data Path. The Data Path field has three options:
•Upload will load information from TruBridge EHR to the Electronic Form.
•Download will load information from Electronic Forms to TruBridge EHR.
•Upload ONLY on form creation will populate the radio button if there is already an answer supplied for the patient in TruBridge EHR or on another form associated with this code upon opening the form for the first time only.
NOTE: To change the code to a Multi-Application code so that the answer may populate the POC Flowchart, select the Multi-App check box after loading the form/formless database code. Reflex options are not available with a Group Title.
20.To save the setup, select Save & Exit.
21.To exit without updating, select the "X" in the top right corner of the screen.