|
<< Click to Display Table of Contents >> My Custom - Custom Filters |
  
|
|
<< Click to Display Table of Contents >> My Custom - Custom Filters |
|
To create a custom filter, select Customize on the action bar. Existing filters may display if they were added by the user previously. Select one or multiple filters as necessary by selecting the appropriate check box. If multiple filters are selected, the My Custom option on the Tracking Board will be inclusive of all selected filters.
To add new filters to the display:
| 1. | Select Charts > Tracking Board > Customize. The Tracking Board Filters screen is displayed. |
| 2. | Select the desired type of filter (Configure Patient Filters, Configure Room Filters, Configure Nurse Filters, or Configure Physician Filters). |
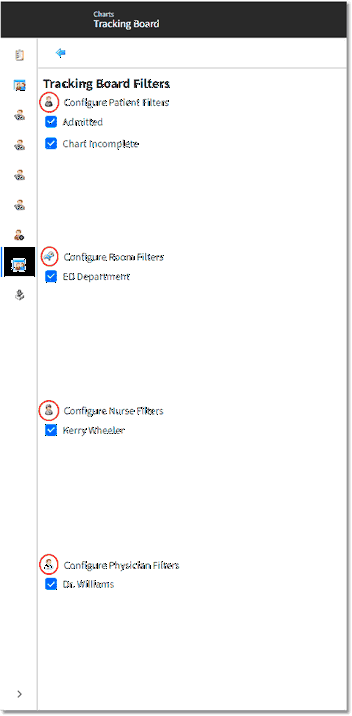
Customize - Tracking Board Filters
| 3. | Select Add. |
![]()
Add Tracking Board Patient Filter
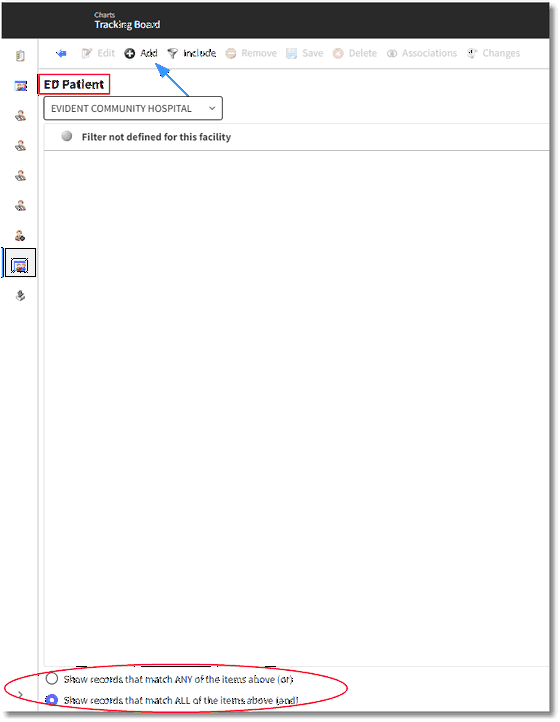
| 4. | The screen displays the existing Tracking Board filters of the selected type (those built by other users or set up by TruBridge as default filters). To see who currently has access to a filter, select the filter description and select Associations. The Associations option also allows for an individual provider/user, group/role, or an entire facility to be granted access to the filter quickly (eliminating the need to add each user individually). |
| 5. | To add an existing filter to the list of user-specific filters, select that filter Description. or If the desired filter is not listed, select New to create a new filter. |
| 6. | To give the filter a title, select the (Filter Title) text; then enter the title in the field that displays and select OK. |
| 7. | At the bottom of the screen, select one of the "Show" options (Show Records that match ANY of the items above (or) or Show records that match ALL of the items above (and)). The option you choose determines how the filter will work if multiple items are included in the new filter. |
Filter Title setup
| 8. | Select Add. |
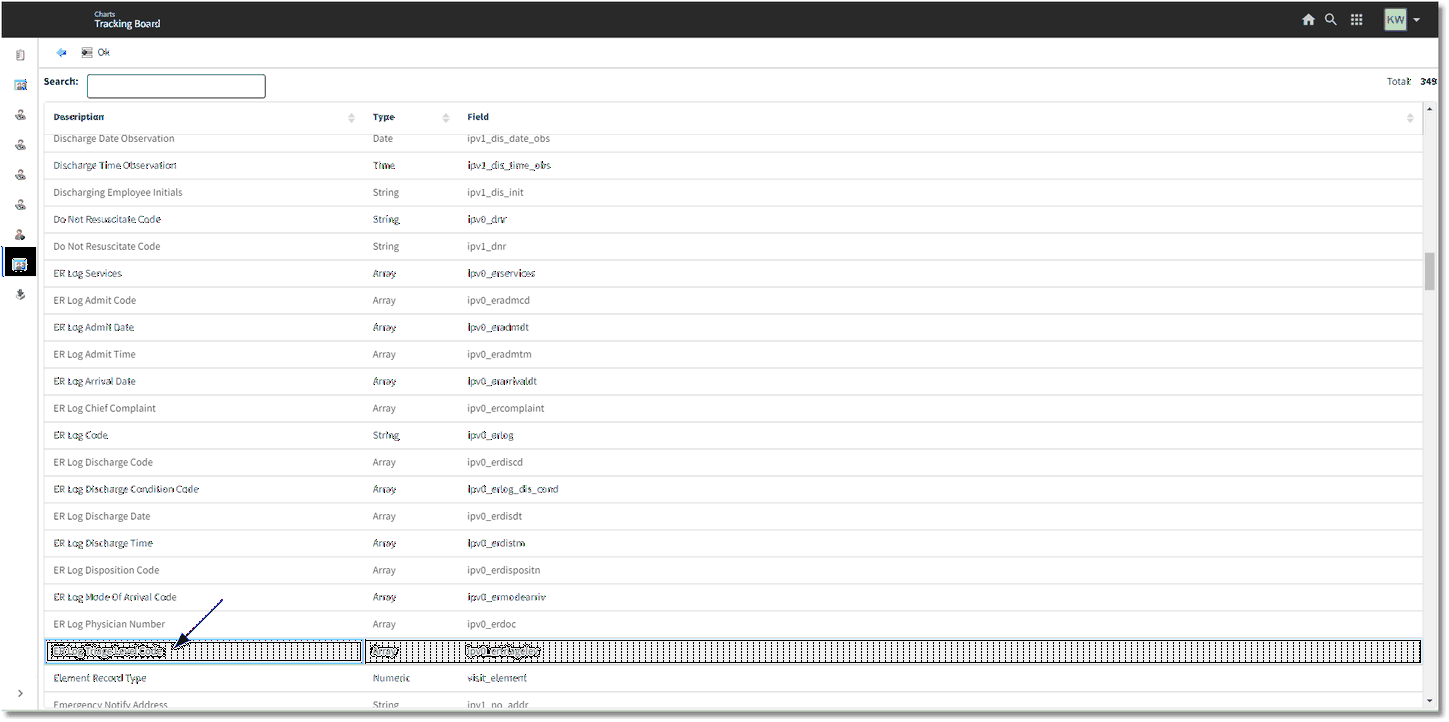
| 9. | Data Dictionary codes may be selected from a list based on the selected filter type (Patient, Physician, Nurse, or Room). Select the desired filter Data Dictionary code description; then select OK. |
Data Dictionary Descriptions
| 10. | Filters can be configured to include or exclude certain values and can also be configured using greater than or less than values. (These options may vary depending on the type of filter being defined.) Use the options available on the screen to select the desired configuration. Double-click the appropriate value; then free-text the desired value in the field at the bottom of the screen in the Enter Value(s) field and press <Enter>. |
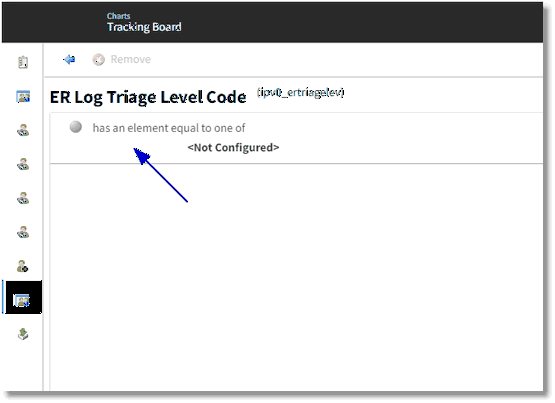
NOTE: If assigning multiple values to one filter, press the <Enter> key on the keyboard after each entry. This will automatically separate the individual values with a comma. In the example below, the Triage Levels List (from Tables > Patient Intake > Triage Levels) have been entered.
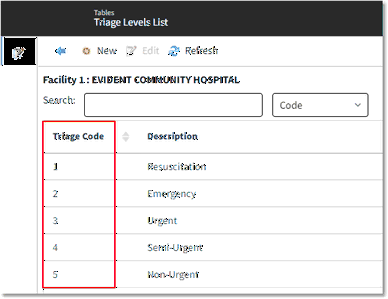
Tables > Triage Levels List
| 11. | When finished, select the back arrow to return to the filter's parameters screen. |
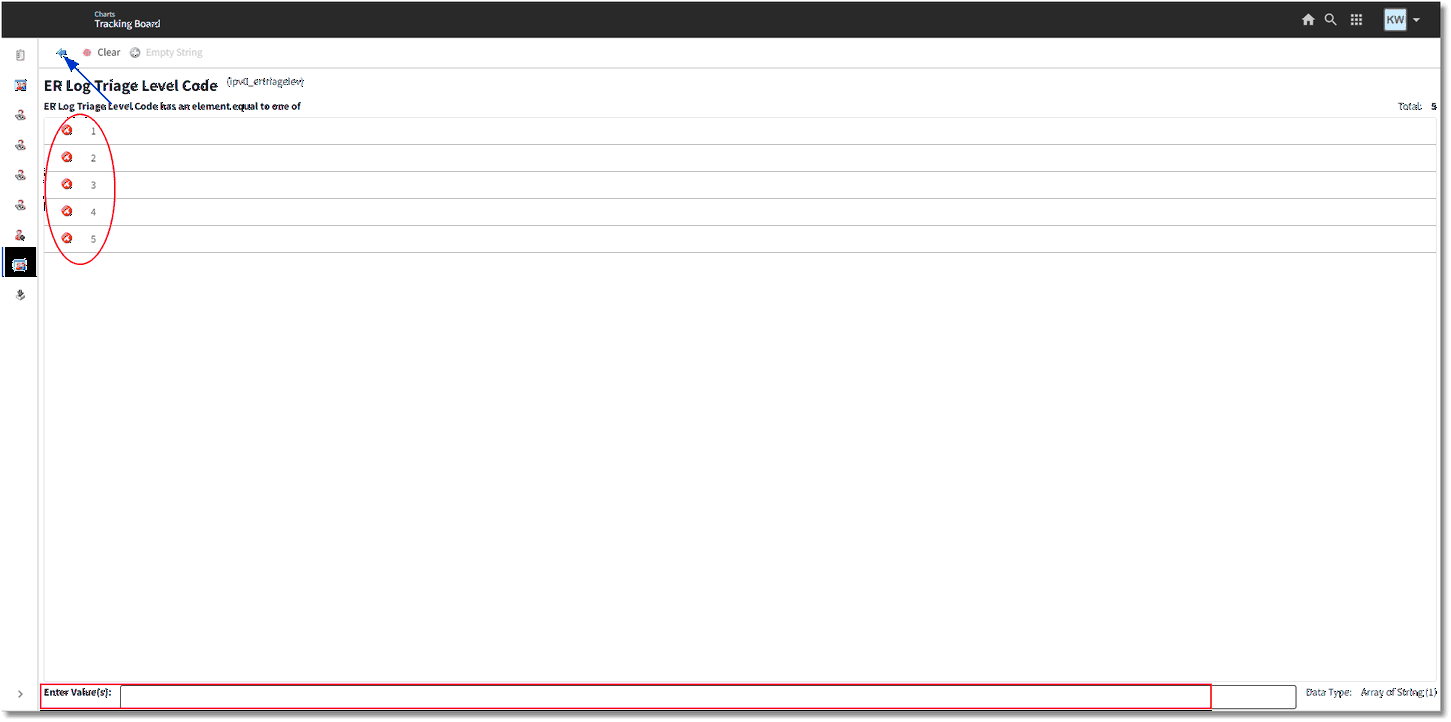
Filter - Enter Values
| 12. | Select the Save button and then the back arrow to exit back to the filter selection screen. |
| 13. | Highlight the desired filter from the list of available filters and choose Select from the action bar (or double-click the filter to add it to the custom filters list). |
| 14. | Once the filter has been added to the Tracking Board Filters list, set the default value by highlighting the desired filter and selecting either Default Checked or Default Unchecked from the action bar. |
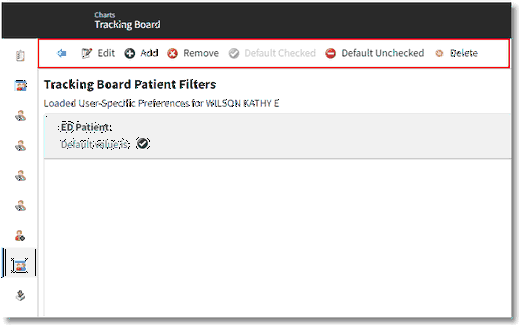
Tracking Board Patient Filters
| 15. | Select the back arrow twice to return to the Tracking Board. |
| 16. | To view the Tracking Board with the custom filters in place, select the My Custom radio button. |