|
<< Click to Display Table of Contents >> Scheduling Multiple Tasks |
  
|
|
<< Click to Display Table of Contents >> Scheduling Multiple Tasks |
|
To schedule multiple tasks for a patient, place the cursor in the appropriate (date and time) cell on the grid for when the first task should be scheduled and double-click.
Search for a patient by Date of Birth or Name. Once the correct patient is displayed, double-click on the patient's name.
NOTE: If it is a patient who has never been seen at the facility, select New Profile to proceed.
Select ![]() Multi-Scheduling from the task bar.
Multi-Scheduling from the task bar.
A listing of all tasks for the resource selected from the scheduling grid will then display. Select the Resource drop-down menu to select another resource.
NOTE: Select All from the resource drop-down menu to view a list of all resources and tasks associated with the schedule.
Select Web Client > Scheduling > Select Date and Time > Select Patient > Multi-Scheduling
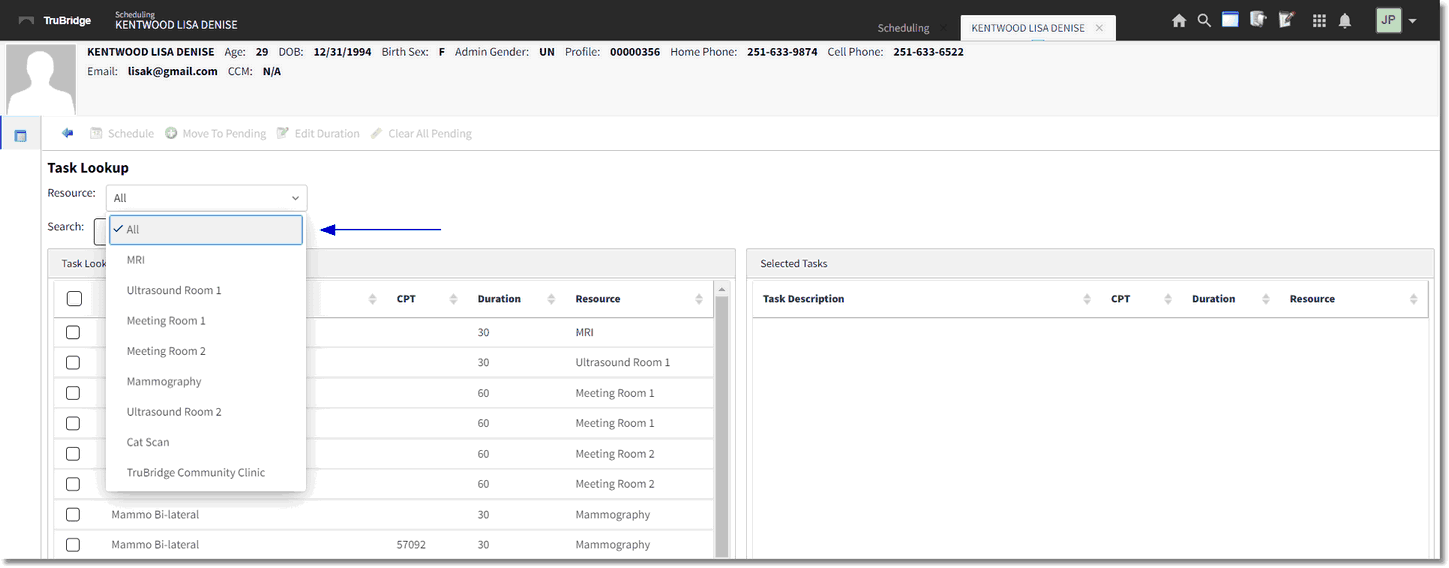
Task Lookup - Multi-Scheduling
Select each task that will need to be scheduled for the patient and then select ![]() Move to Pending on the action bar to move the tasks to the Selected Tasks column. If a task is moved to the Selected Tasks column in error, double-click the task to remove it. To remove all tasks listed in the Selected Tasks column, select
Move to Pending on the action bar to move the tasks to the Selected Tasks column. If a task is moved to the Selected Tasks column in error, double-click the task to remove it. To remove all tasks listed in the Selected Tasks column, select ![]() Clear All Pending from the action bar.
Clear All Pending from the action bar.
NOTE: Multiple tasks may be moved to the Selected Tasks column at one time by holding down the Ctrl key and selecting each task and then selecting Move to Pending.
Once all tasks have been selected, select ![]() Schedule on the action bar.
Schedule on the action bar.
NOTE: The first task listed in the Selected Tasks column will be scheduled for the original date and time selected on the scheduling grid.
TruBridge EHR will then proceed to the Event screen. Fill out the Event screen and select ![]() Update once finished.
Update once finished.
NOTE: Please refer to the Event Screen section of this user guide for information on how to complete this screen.
TruBridge EHR will then go to the Appointment Detail screen and list all the tasks in order by selection. The first task will be at a status of "SCHEDULED" with the date and time originally selected on the scheduling grid. Any additional tasks will be at a status of "UNSCHEDULED".
Select Web Client > Scheduling > Select Date and Time > Select Patient > Multi-Scheduling > Move to Pending > Schedule > Update
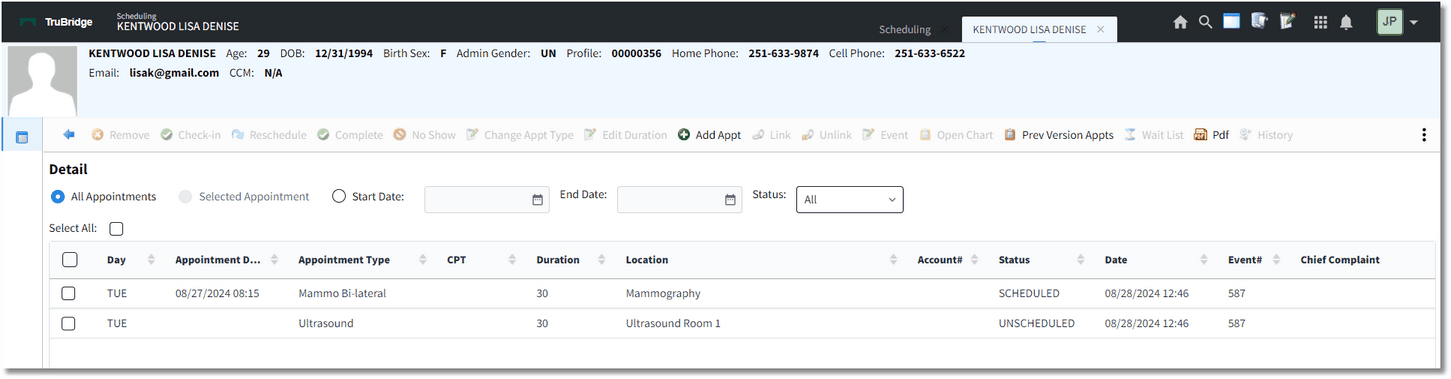
Appointment Detail - Multi-Scheduling
Unscheduled Tasks
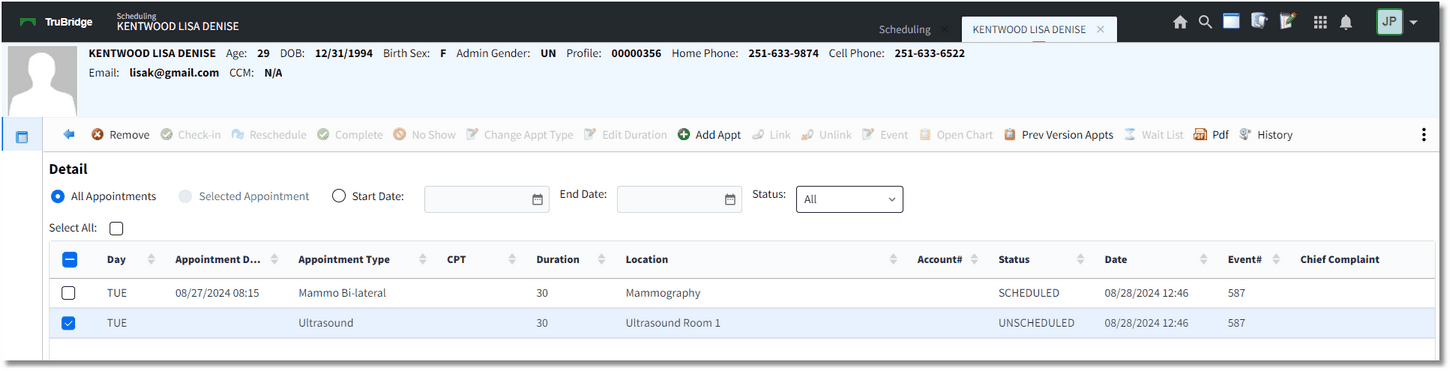
Each task at the Unscheduled status will need to be scheduled. To do this, double-click on the Unscheduled task.
Select Web Client > Scheduling > Select Date and Time > Select Patient > Multi-Scheduling > Move to Pending > Schedule > Update
Appointment Detail - Multi-Scheduling
TruBridge EHR will then go to the Weekly Schedule to allow the user to select the date and time to schedule the task. The date of the schedule will default to the date of the first scheduled task, but this may be changed if necessary. Double-click an available date and time to schedule the task.
TruBridge EHR will then return to the Appointment Detail screen and the task will then display at a "SCHEDULED" status. If there are any additional Unscheduled tasks, these may also be selected for scheduling at this time. Once all tasks have been scheduled, select the back arrow on the action bar to return to the scheduling grid.