|
<< Click to Display Table of Contents >> Images |
  
|
|
<< Click to Display Table of Contents >> Images |
|
Images may be attached to a patient's appointment from the Event screen or the Appointment Detail screen. Once an appointment with an image is linked to a visit, the image may then be viewed in Electronic File Management.
NOTE: If an appointment is unlinked from a visit, the scheduling image on the original linked account will need to be deleted from Appointment Images AND through Electronic File Management.
Before images may be attached to a patient's appointment, any image titles that will be used in the Patient Scheduling application must have the 'Scheduling' option selected in the Titles table. Please refer to the Titles section of this user guide for more information.
Event Screen
To attach an image from the Event screen, select ![]() Images on the action bar.
Images on the action bar.
NOTE: If the facility's optical drive has not been set up for your facility, the following message may display when the Images option is selected, "Warning: Scheduling Optical Drive is not set. Please contact TruBridge to have the drive set." Call TruBridge Support if this message displays.
Any existing images for the patient's appointment may display on the screen. Select ![]() Add on the action bar to begin adding an image to the appointment.
Add on the action bar to begin adding an image to the appointment.
Select Web Client > Scheduling > Select Date and Time > Schedule > Select Patient > Select Task > Schedule > Images
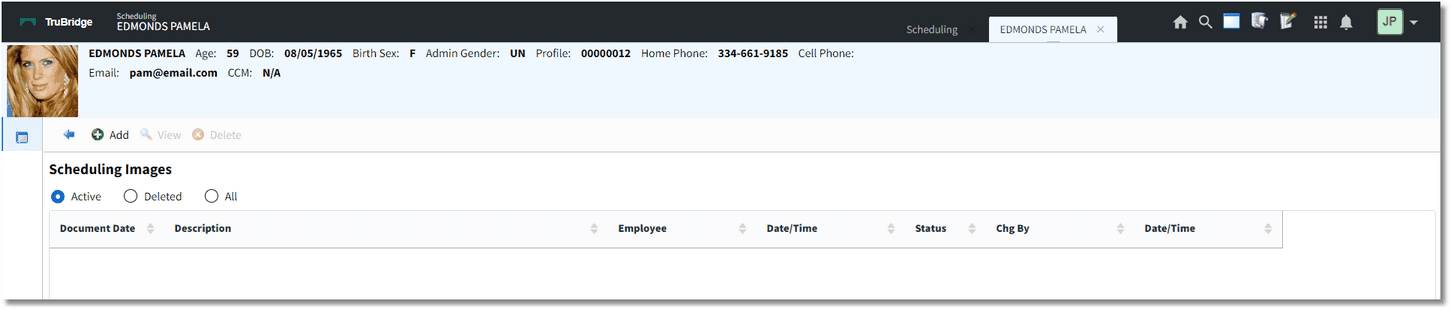
Scheduling Images
Select an image title from the Scheduling Image List. Once an image title is selected, the Import option will become enabled. Select ![]() Import on the action bar to continue.
Import on the action bar to continue.
Select Web Client > Scheduling > Select Date and Time > Schedule > Select Patient > Select Task > Schedule > Images > Add
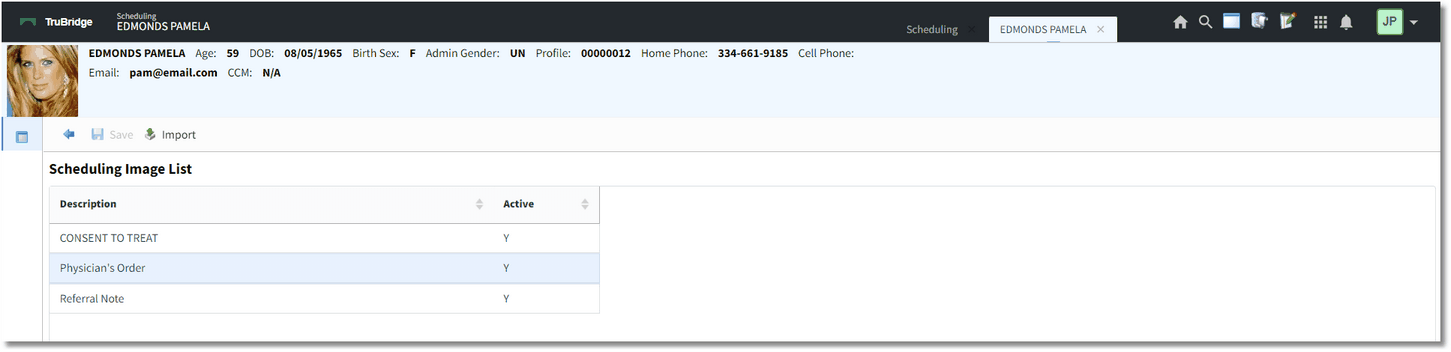
Scheduling Image List
Once Import is selected, select the file from where it is located on the computer. TruBridge EHR will then return to the Scheduling Image List. Select ![]() Save to attach the image to the appointment. To exit the screen, select the back arrow.
Save to attach the image to the appointment. To exit the screen, select the back arrow.
NOTE: If 'Enter Document Date' is selected in the Image Titles table, an additional prompt will appear to enter an alternate date and time the image is being attached to the appointment.
The image title of the attached image will then display on the Scheduling Images screen.
To view the attached image, select the image title and then select ![]() View on the action bar.
View on the action bar.
If the image was attached to the wrong appointment, select the ![]() Delete option to mark this image as deleted. In order to have access to this option, the image title will need to be set to allow deletion and users will need the Behavior Control, 'Delete Scheduling Image' set to Allow in System Administration.
Delete option to mark this image as deleted. In order to have access to this option, the image title will need to be set to allow deletion and users will need the Behavior Control, 'Delete Scheduling Image' set to Allow in System Administration.
Radio buttons are available to delimit the images by Active, Deleted or All. The default will be Active.
Appointment Detail Screen
Images may also be attached from the Appointment Detail screen. Select the ![]() kabob menu on the action bar to display the Images option.
kabob menu on the action bar to display the Images option.
The process for adding images from Appointment Detail is the same as adding it from the Event screen.