|
<< Click to Display Table of Contents >> Edit Ancillary Orders |
  
|
|
<< Click to Display Table of Contents >> Edit Ancillary Orders |
|
Select the Ancillary item from the Pending Orders box or Pending Order Review screen to begin editing the order. Orders may be selected by double-clicking on an item. This will open the Edit screen, where any necessary changes may be made and saved. Items will display in the order in which they were selected. Multiple items may be selected by selecting and holding Ctrl while selecting the orders. If multiple items are selected, the Edit button must be selected from the action bar.
Fields in the item should pull with pre-defined settings based on the pathway the order is selected.
•If the item is selected from an Order Set, the predefined values will pull into the fields depending on how the item was saved in the Order Set setup.
•If the item is selected from the Departments listing, the predefined values in the Item Master will populate.
•If the item is selected from an Order Lists, the predefined values that were saved by the user that created the Order List will populate.
Select Order Entry > Search Options > Pending Orders > Select Item
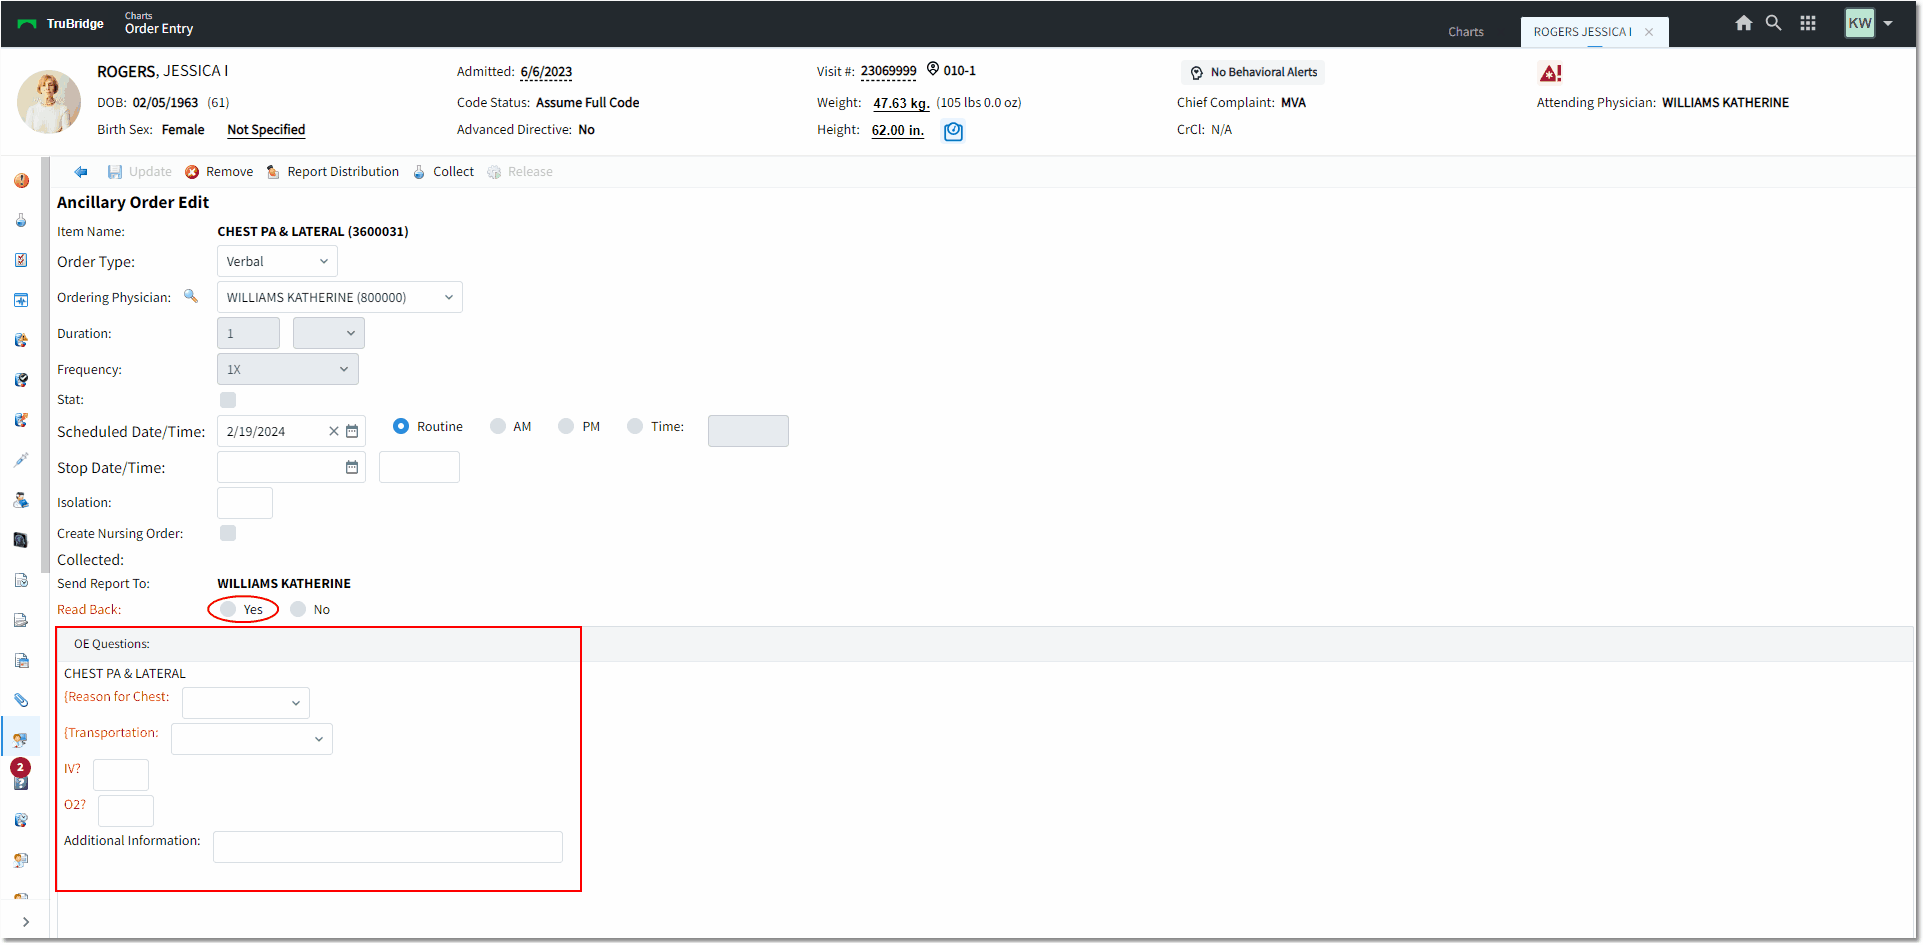
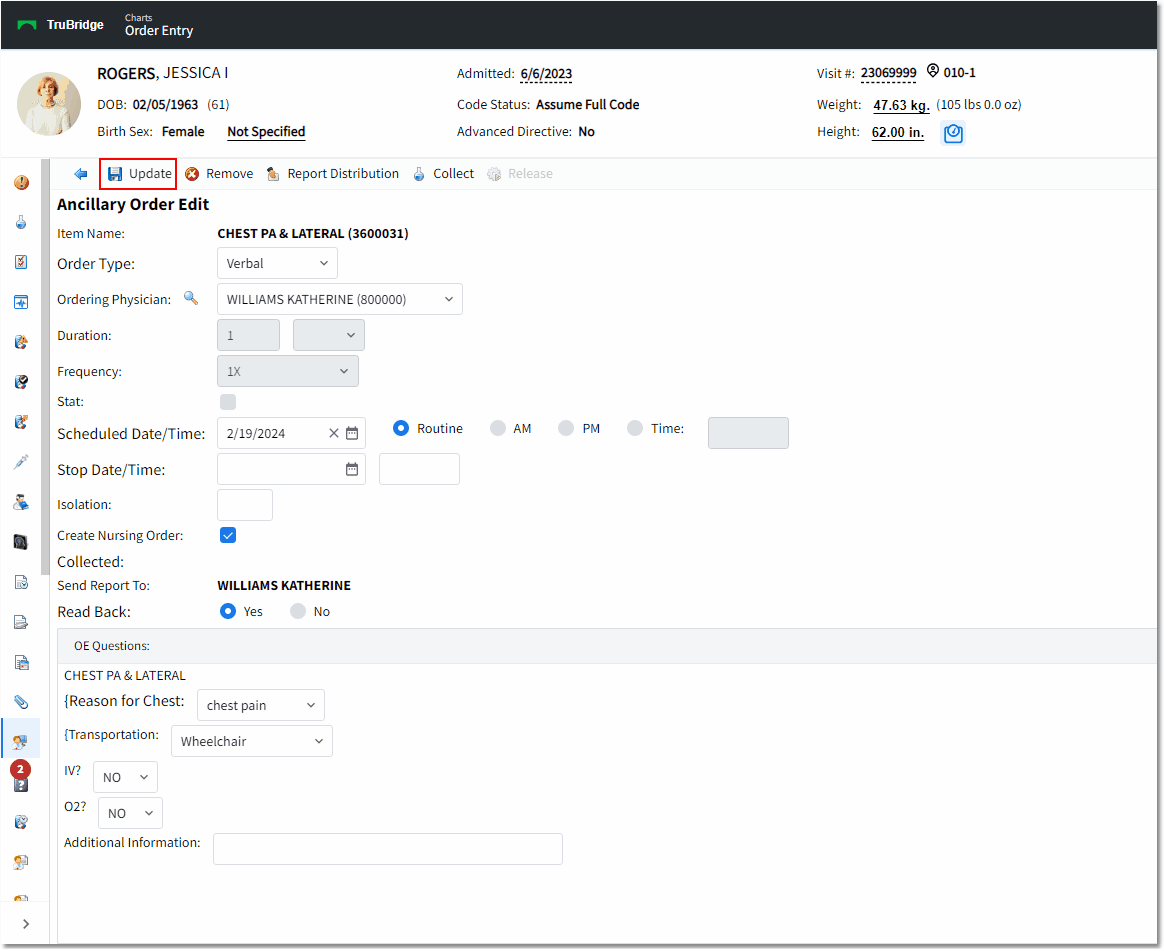
Ancillary Order Edit
The Item fields will display in the following order:
•Item Name/Description: The item title will pull from the item master along with the item number.
•CPT: The associated CPT Code for the selected item will display here, if applicable.
•Order Type: The Order Type may be changed once the item has been selected. This will allow users to place multiple types of orders at one time.
•Ordering Physician: The Physician entered on the Search Orders screen will populate this field but may be changed to allow users to place orders from multiple physicians at the same time. The drop-down box will list the Attending, Secondary and Family Physician names that have been listed on the patient's account. The magnifying glass icon may be selected to look up staff and non-staff physicians if the ordering provider is not currently listed on the account or available in the drop-down.
▪Select the magnifying glass icon to display the Physician Look-Up screen.
▪The list will default to display all Staff and Non-Staff physicians. Physicians are listed in alphabetical order with the physician number to the left of the name. The search option may be changed to list the physicians by their physician number. If the physician is not located in the Staff Index, select Non-Staff. To change the ordering physician, double click the physicians name from the look-up table.
•Duration: This field works in conjunction with Multiple Orders and OE Ask Number of Procedures fields in the item setup. If the option for Multiple Orders is set to "No," this field will be grayed out and the duration will default to 1.
•Frequency: If an item is set up to allow a frequency entry, it may be entered here. If the item does not allow a frequency, the field will be grayed out.
•Stat: To place an order as Stat, select the Stat check-box.
•Schedule Date/Time: To adjust the date or to assign a specific time for the order, select Schedule Date/Time. The Date Picker may be used to select the date.
▪The system will not allow a service date to be entered that falls before the admit date or after the discharge date. If an attempt is made to advance the service date after the discharge date of an account, the user will receive a message that reads: "Service date after discharge date." If an attempt is made to back date the service date before the admit date of an account, the user will receive a message that reads: "Service date before admit date."
▪The Schedule Date/Time field may be set as a required field when an order is placed and verified via the Nursing Station or the Ancillary Department. This feature is set up on a per item basis. Nursing staff may refer to the Ancillary Reference User Guide, Order Entry Information for more information on how to set this field as required.
▪If no specific time is needed, select the radio button for either AM or PM to indicate if the scheduled time will either be in the morning or afternoon. If AM is selected, the scheduled date/time will default to tomorrow's date. If PM is selected the order will be scheduled for that afternoon.
▪If a specific time is needed, select the radio button for Time and enter in the scheduled time.
•Isolation Status: The patient’s Isolation Status will populate based off the information entered in the patient’s demographics.
▪To change the isolation status, select the text box and type any upper case letter, lower case letter, or number to denote the type of isolation. These codes are hospital defined. This option is specific to nursing.
NOTE: If the Isolation Status is changed here, it will automatically update the patient's Isolation Status throughout the system.
•Create a Nursing Order: A Nursing Order will automatically be created when this box is selected. A new order will be added to the Pending Order box and will contain the item description, the start date and time, followed by (Nursing) to alert the user that it is a separate order. This option is specific to nursing.
•Collected: Collection information will automatically populate this field once it has been entered. This field is case sensitive, and initials should be entered in all upper case letters.
•Send Report To: The physicians that are currently associated with the patient and have been designated to receive reports via Report Distribution, will display here.
•OE Questions: Any order entry questions that are associated with the item will be listed here. Comments that pertain to the order may also be entered.
▪If the item being edited has a required order entry question, it will be listed in red font. Required questions must be answered in order to Update the order.
▪If predefined answers have been set for required questions, select the appropriate predefined response from the drop-down. Free-text responses may also be entered by selecting the Free-Text option from the drop-down menu.
▪Additional comments may be added to available lines including any applicable comments about the patient. The comments will print on the order verification slip at the nursing station and on the order received in the department.
Select Order Entry > Search Options > Pending Orders > Select Item
Ancillary Order Edit
Once all of the Item fields have been addressed, several options are available from the action bar:
•Back Arrow: When selected, the Back Arrow will prompt for save confirmation if any changes have been made to the order.
▪If Yes is selected, the order will be exited without saving changes.
▪If No is selected, it will return the user to the Order Review screen.
•Update: Will save any order edit changes and will return the user to the previous screen
•Remove: Removes the current order from the Pending Orders queue
•Report Distribution: Will launch the Report Distribution screen. See Report Distribution
•Collect: Will bring the user to the Collection Information screen