|
<< Click to Display Table of Contents >> Referral/Transition of Care |
  
|
|
<< Click to Display Table of Contents >> Referral/Transition of Care |
|
The Referral/Transition of Care is used to record when a patient is being referred to a follow-up physician or care is being transitioned to another provider. To view Referral/Transition of Care history, go to Patient Chart > Health History and see the entries under the Referral/Transition of Care heading. (TIP: Choose List View if you want to edit items in the list.)
This section covers the following topics:
To Add a Referral/Transition of Care
To Print a Referral/Transition of Care
To Edit a Referral/Transition of Care
To Delete a Referral/Transition of Care
To View Patient Medical Summaries
1.To add a new referral/transition of care, go to Health History > New. The Health History Categories page is displayed.
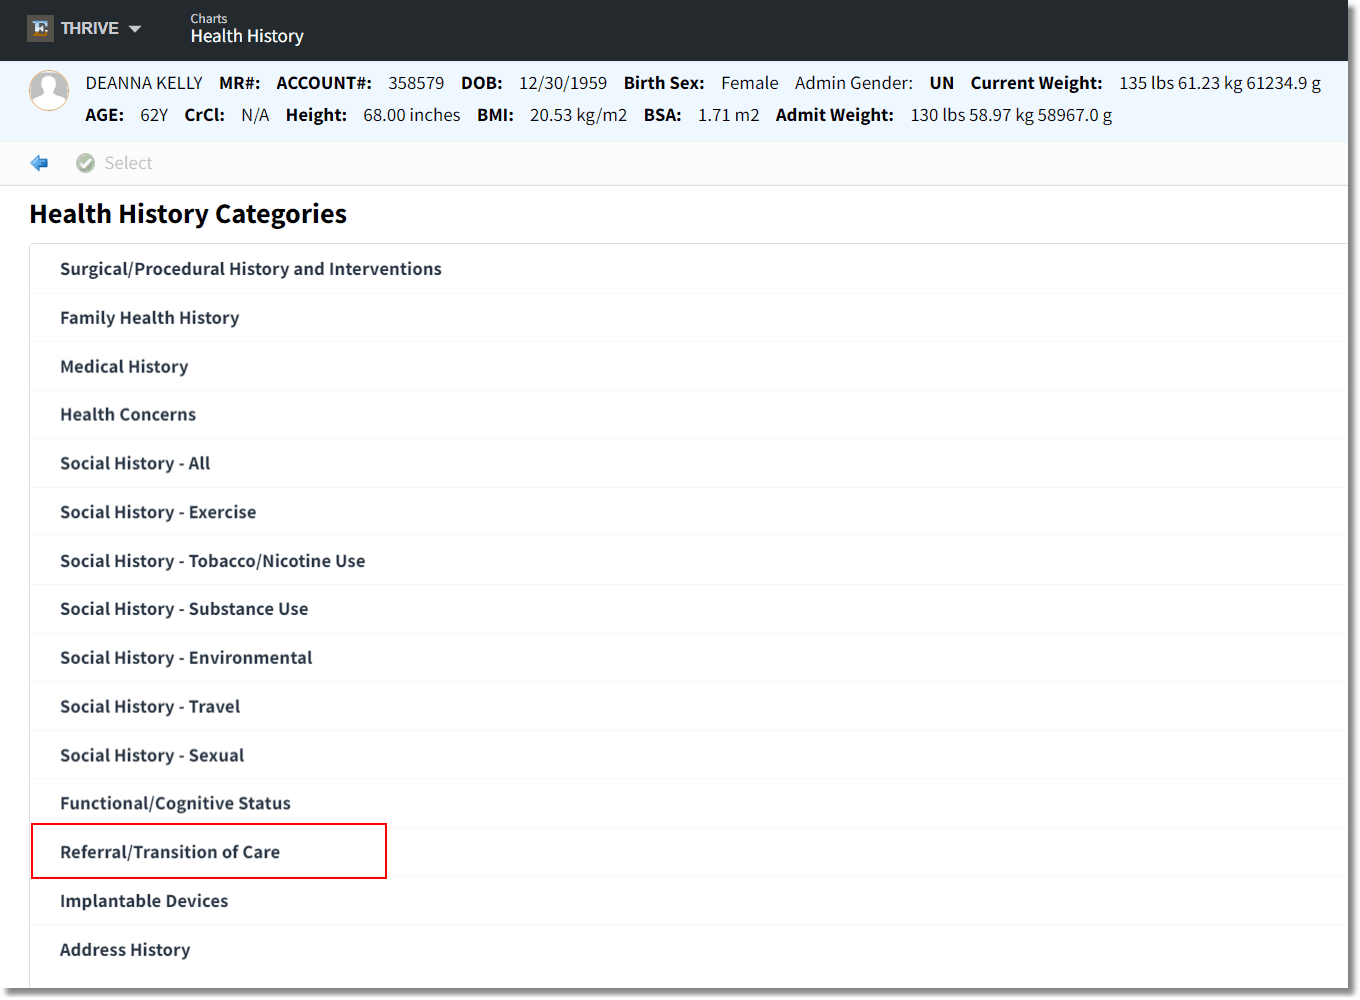
Health History Categories
2.Double-click Referral/Transition of Care from the list of Health History categories. The Patient Referral/Transition of Care screen is displayed.
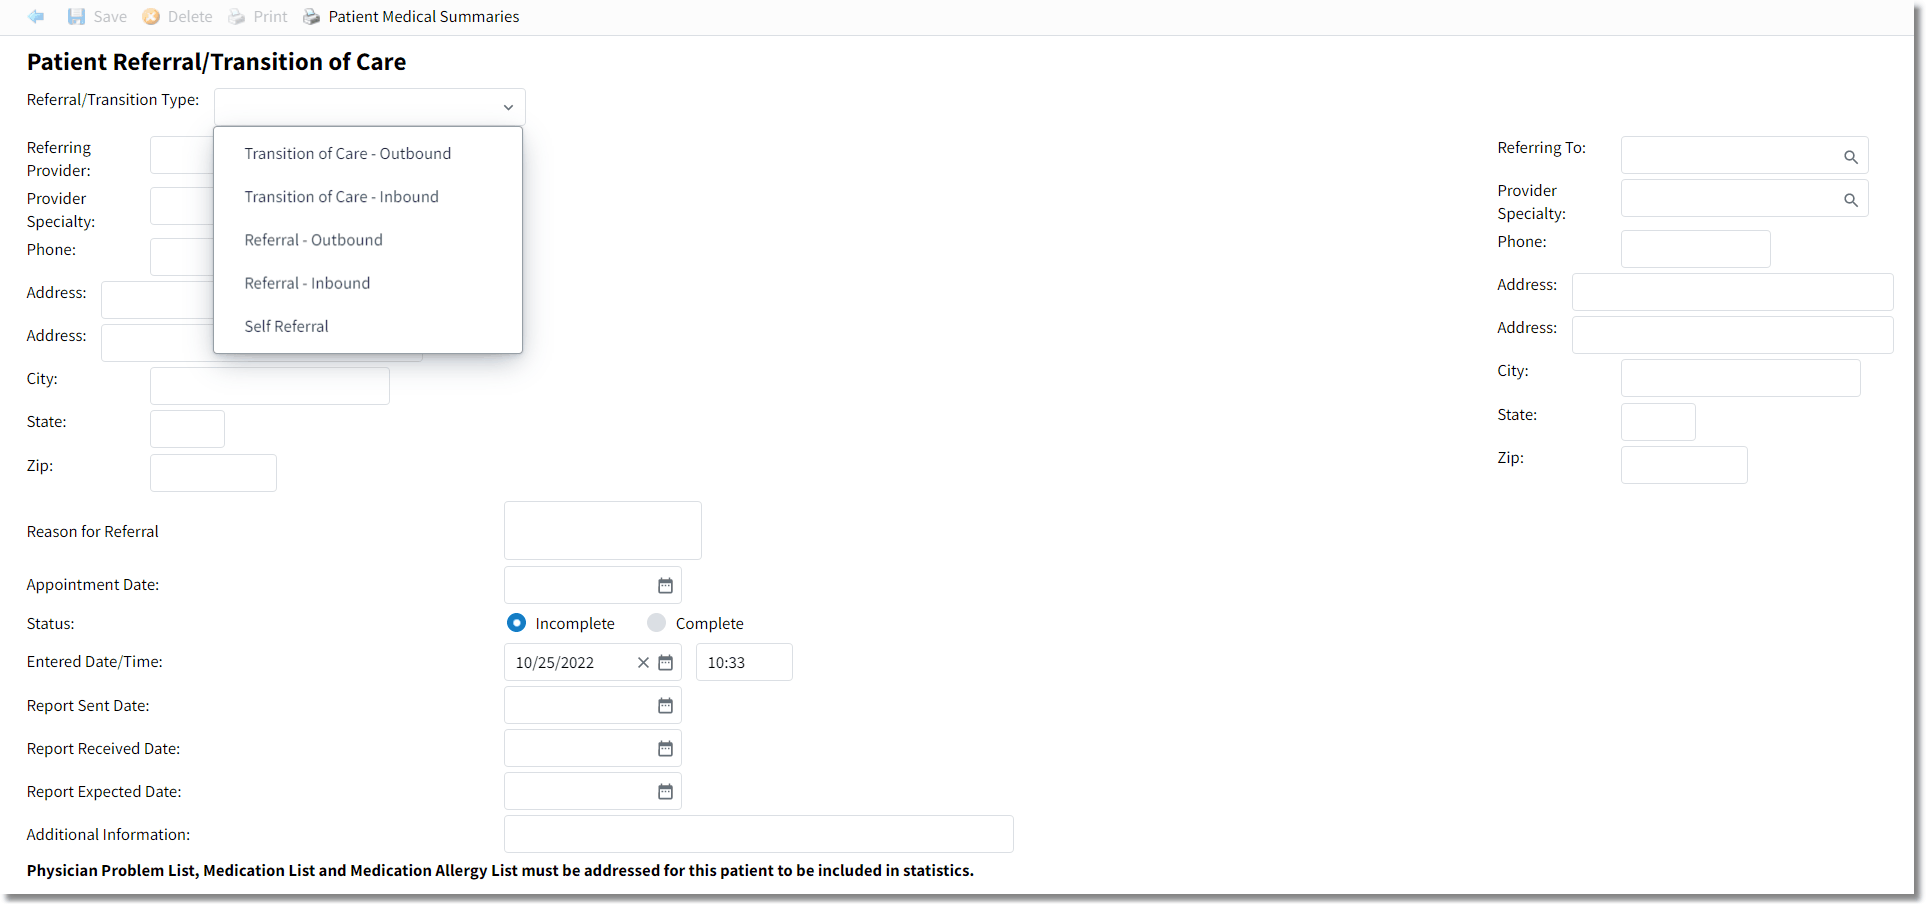
Patient Referral/Transition of Care
3.In the Referral/Transition Type field, select one of the following: Transition of Care - Outbound, Transition of Care - Inbound, Referral - Outbound, Referral - Inbound, or Self Referral. This is a required field. Based on the type of referral selected, some fields will populate with the patient's provider information.
NOTE: Referral - Inbound and Self Referral will NOT be included in the Meaningful Use Denominator. If Referral - Inbound is selected, a field is displayed for Request Made but Document not Received.
4.Complete the Receiving Provider information:
•Receiving Provider: Enter the receiving provider's name using free text or use the look-up icon to select a specific individual from the predefined Referring Physicians or Referring Facilities Table in the Business Office Tables.
•Provider Specialty: Use the magnifying glass to search for and document the provider's specialty.
•Phone: If the provider is selected from the Referring Physician Table, this automatically pulls from the table. It may be entered manually as well. Enter this information without hyphens or spaces.
•Address: Consists of two separate lines that pull automatically from the Referring Physician Table or may be manually typed in.
•City: Pulls automatically from the Referring Physician Table or may be manually typed in.
•State: Pulls automatically from the Referring Physician Table or may be manually typed in.
•Zip: Pulls automatically from the Referring Physician Table or may be manually typed in. Enter up to nine numeric characters.
5.Enter the Transferring Provider information (on the right side of the screen):
•Transferring/Referring Provider: Allows for entry of provider or facility to which the patient is being transferred/referred. NOTE: If an active hospitalist is assigned to the patient, the default will be the hospitalist instead of the attending physician.
•Provider Specialty: Provides a magnifying glass search to document the specialty.
•Phone: If the provider is selected from the Referring Physician Table, this automatically pulls from the table. It may be manually entered as well. Enter this information without hyphens or spaces.
•Address: Consists of two separate lines that pull automatically from the Referring Physician Table or may be manually typed in.
•City: Pulls automatically from the Referring Physician Table or may be manually typed in.
•State: Pulls automatically from the Referring Physician Table or may be manually typed in.
•Zip: Pulls automatically from the Referring Physician Table or may be manually typed in. Enter up to nine numeric characters.
6.In the Reason for Referral or Reason for Transfer field, enter the reason using free text. This field accepts 160 characters.
7.In the Appointment Date field, use the calendar to select the appropriate date or enter the date using the MMDDYY or MMDDYYYY format.
8.The Status field defaults to Incomplete. Change to Complete if needed.
9.The Entered Date/Time field displays the date/time the Patient Referral/Transition of Care was entered. However, this field will change when the Referral/ Transition of Care is updated with a new date/time. The changes are viewable in the Security Change Log in System Administration.
10. In the Report Sent Date, Report Received Date, and Report Expected Date fields, enter the date using the calendar icon or by manually typing the date in MMDDYY or MMDDYYYY format.
11. If needed, enter additional information in the Additional Information field. this field accepts 80 characters.
12. At the bottom of the screen a message is displayed as a reminder. The Physician Problem List, the Medication List, and the Medication Allergy List must be addressed for this patient in order to be included in the statistics for the Transition of Care Promoting Interoperability objective.
13. Click Save to save changes. Click the blue back arrows to return to the Health History Review screen where your newly created referral/transition of care is displayed.
NOTE: Referral/Transition of Care documentation is displayed in the Patient Summary in the Referral/Transition of Care section.
1.Go to the Health History Review screen and select List View format.
2.Double-click the item to display the Referral/Transition of Care Edit screen (or highlight the desired family health entry and select Edit). The Referral/Transition of Care is displayed.
3.Select Print. A PDF of the Referral is displayed. Select the printer icon and make the appropriate printer selections. Then select Print.
1.Go to the Health History Review screen and select List View format.
2.Double-click the item to display the Referral/Transition of Care Edit screen (or highlight the desired family health entry and select Edit). The Referral/Transition of Care is displayed.
3.Make the desired edits.
4.Select Save to save changes.
1.Go to the Health History Review screen and select List View format.
2.Double-click the item to display the Referral/Transition of Care Edit screen (or highlight the desired family health entry and select Edit). The Referral/Transition of Care is displayed.
3.Select Delete. A confirmation message is displayed. Click Yes to confirm the deletion.
4.Select Save upon completion.
1.Go to the Health History Review screen and select List View format.
2.Double-click the item to display the Referral/Transition of Care Edit screen (or highlight the desired family health entry and select Edit). The Referral/Transition of Care is displayed.
3.Select Patient Medical Summaries. The Patient Medical Summaries options are displayed: Discharge Summary, Patient Summary, and Referral Note.
4.Double-click the desired document to generate (or single click and select View). The Patient Summary is displayed. From the display, you can submit to the provider, submit to HIE, copy to portable media, print, view XML, view the CDA viewer, and edit exclusions. See the Patient Medical Summaries (CCDA) User Guide for additional information.
5.Click the blue back arrow to return to the Referral/Transition of Care screen.
The Referral/Transition of Care screen can also be accessed from the following locations:
•Communication: Select Patient Account > Communication > Referral/Transition of Care.
•Health Information Resource: Select Patient Account > Health Information Resource > Referral/Transition of Care.
•Whiteboard: Go to Whiteboard > Patient. The Referral/Transition of Care may be added to any of the available tabs on the virtual chart. See the Virtual Chart Setup section of the POC Setup User Guide for additional information on adding the Referral/Transition of Care to the tabs.