|
<< Click to Display Table of Contents >> Health Status Assessments |
  
|
|
<< Click to Display Table of Contents >> Health Status Assessments |
|
The Health Status Assessments section displays flowcharts, multi-clinician documents, and forms from the Documentation module that are designated as a "Health Status Assessment". To view the patient's Health Status Assessment documentation, go to Patient Chart > Health History and see the entries under the Health Status Assessment heading. (TIP: Choose List View if you want to edit items in the list.)
This section covers the following topics:
To Add a New Health Status Assessment
To Amend a Health Status Assessment
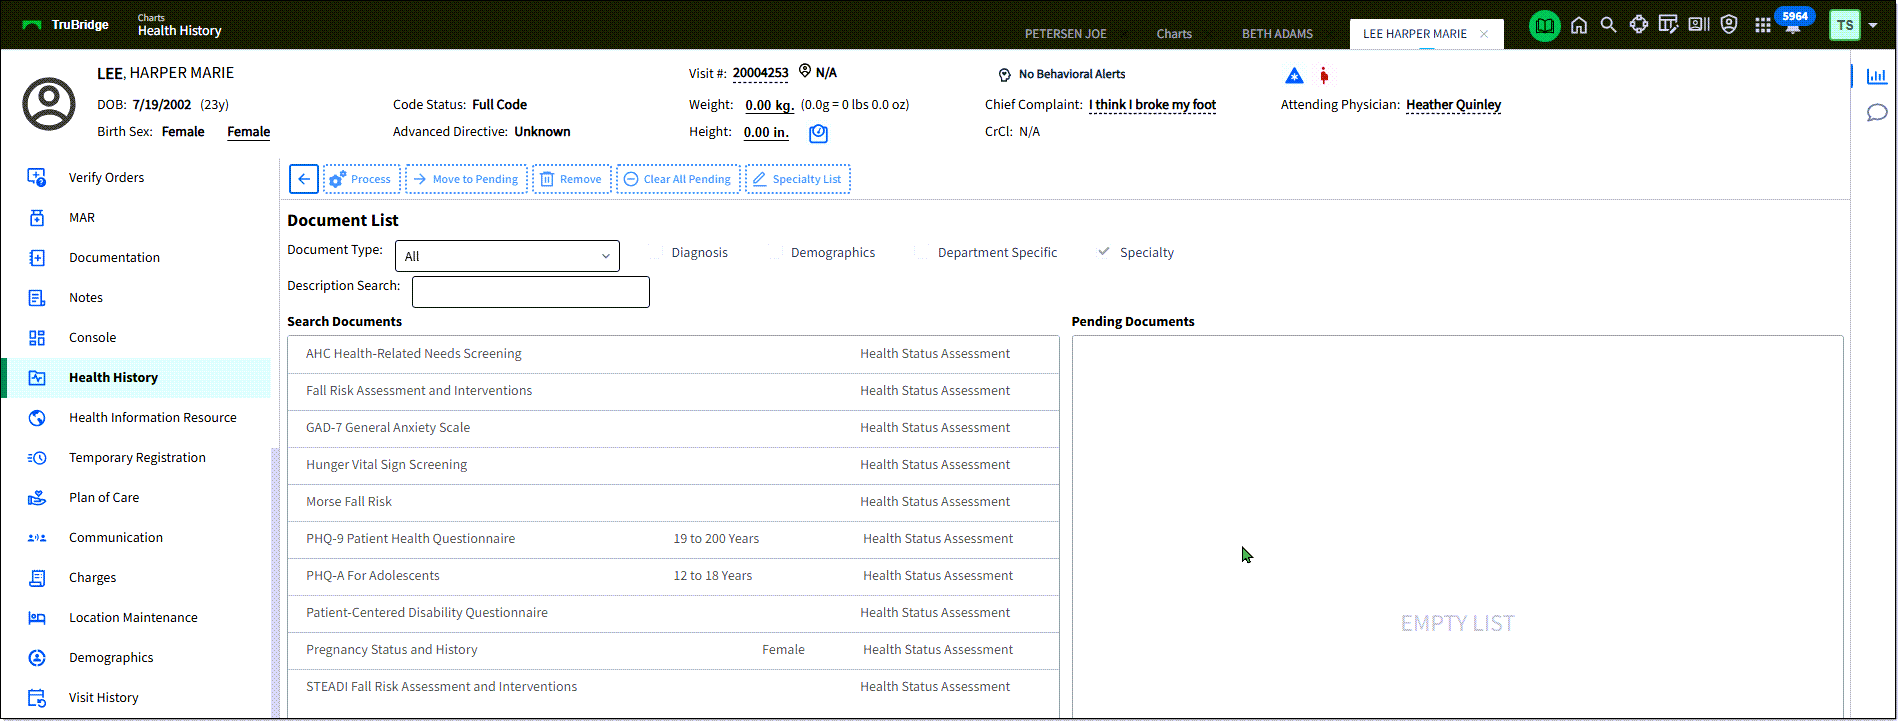
1.To add a new health status assessment item, go to Health History > New. The Health History Categories page is displayed.
2.Double-click Health Status Assessment from the list of Health History categories. The Document List screen is displayed.
3.Highlight the desired document and select Move to Pending. (Or, double-click the document to move it the Pending Documents list.)
4.From the Pending Documents list, highlight the desired document, then click Process. This displays the assessment form for completion.
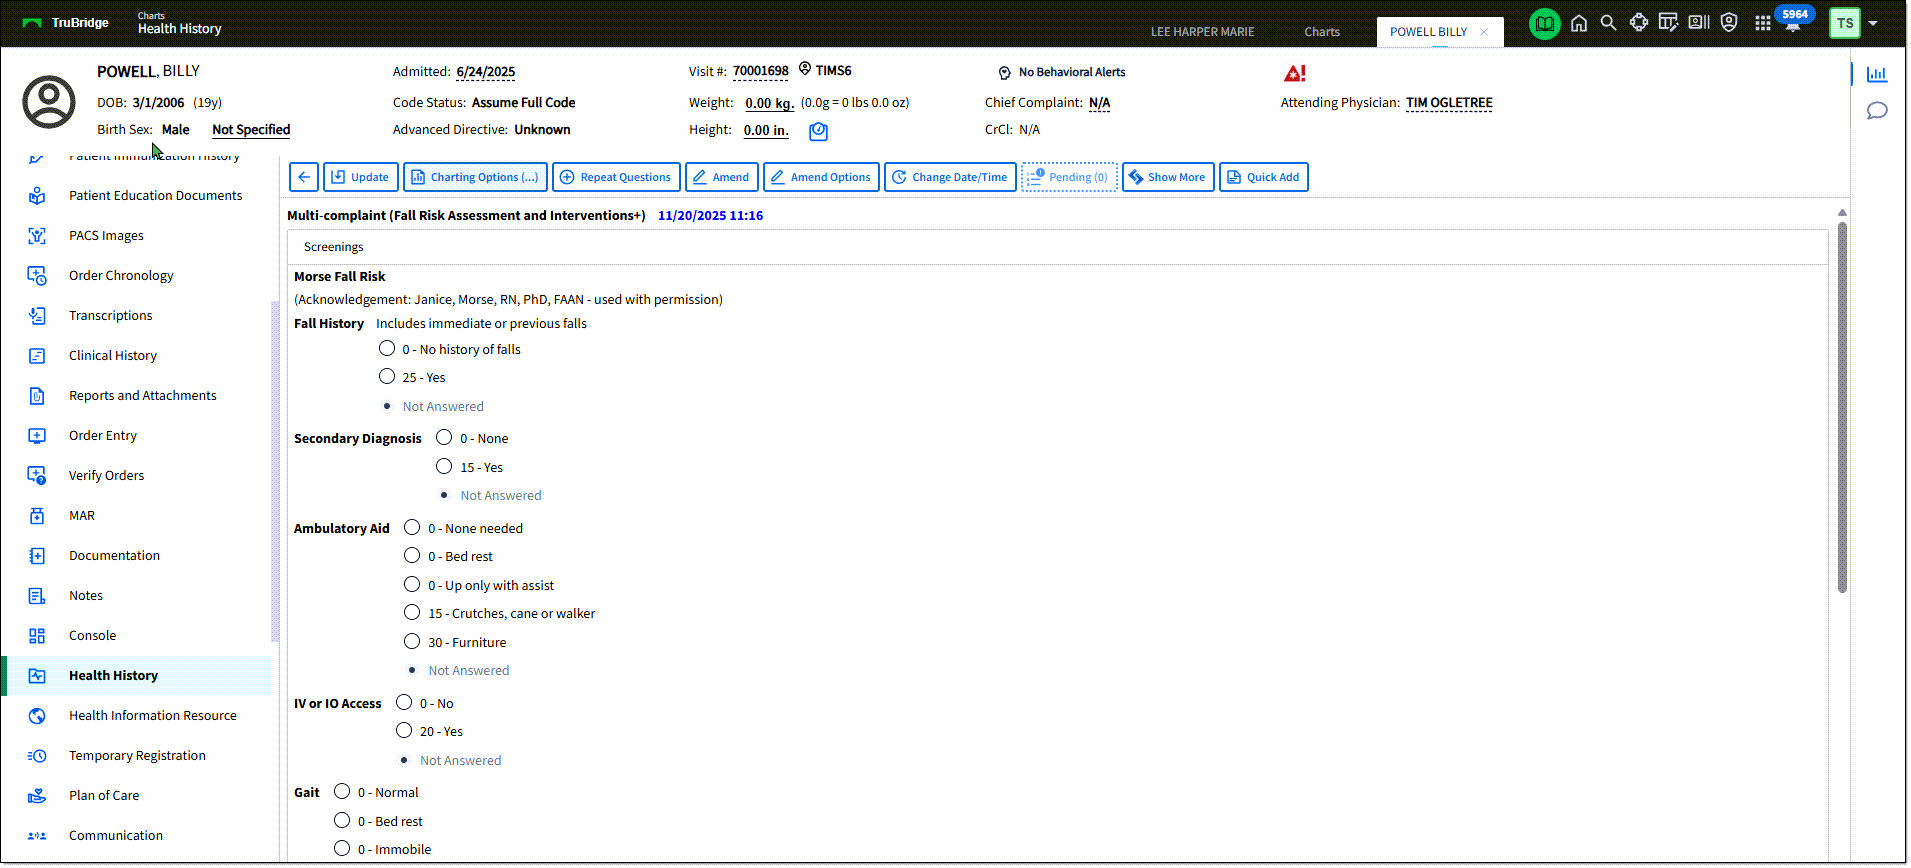
5.The current date/time is assigned to the assessment. If needed, select the Change Date/Time field to select an earlier date or time that the assessment was completed.
6.Complete the items of the assessment.
7.Click Update to save. Based on the selected responses on the health status assessment, new health concerns may automatically be added. Review the Health Concerns section for additional information on addressing those.
1.From the Health History Review view, double-click the assessment you'd like to amend. The assessment documentation is displayed on the screen.
oTo change date/time or remove all entries: Select Amend Options. Select one of the options: Change date and time for my entries in entire document or Remove my entries for document. If you select to change the date for your entries, enter the appropriate date/time in the provided fields. Select Process. A confirmation message is displayed. Select Yes to continue.
oTo change individual responses, select Entry Mode. Then, click Amend. Enter the appropriate responses.
2.Select Update to save changes. Once a question has been amended and update is selected, the question will display the most recent value on the screen. The prior/original documentation is reviewable on the Review Options screen by selecting Include Stricken. Amended information will display with a strike-through to indicate that it has been changed or amended.
•Charting Options: Charting Options allows the user to insert parts of the patient record into the current document.
1.In the Add To field, select where you'd like to add the item. You can add to the end of the form or to specific questions/responses in the form.
2.From the list on the left, select the type of information you'd like to insert. The available items are displayed. Select the check box for the item(s) you'd like to insert. (Or, select to add new information to add.)
3.Select Insert. The information is added to the form/document in the location specified.
4.When Charting Options is used to insert information into the Flow Chart, an icon will display in the answer column for that section that will alert the user that additional information has been charted on the section. To view the additional information, select the icon.
•Retract will allow the user to retract the document.
1.From the Health History Review view, double-click the assessment you'd like to retract. The Retract option is available to the creator of the document. It is also available for users with the Clinical Documentation Behavior Control "Amend Clinical Documentation for any Login."The assessment documentation is displayed on the screen.
2.Select Retract. The Retract Reason field is displayed. Use the drop-down list to select a retract reason.
3.Click Select to retract the document. To cancel, select the back arrow. Once a retract reason and Select has been chosen, the document has been retracted.The retracted document will display under the Retracted folder on the Document Tree. The document will display with a strike through all documentation in the narrative view. Selecting Review Options will display all retracted information as Stricken Data in narrative and PDF format, with the name/credentials of the user that retracted the document, the retract reason and date/time that the document was retracted.
•Review Options: Use this option to apply data display parameters.
1.From the Health History Review, double-click the assessment you'd like to modify the review options for. The assessment is displayed.
2.Select Review Options. The Review Options screen is displayed.
3.Modify the display options for this assessment. Use the Date/Time filter, User filter, Include Stricken, Exclude Credentials Date/Time, Sort by, and Reverse Chronological options to customize the display.
4.Select Process to apply the filters. The filtered documentation will then display in the bottom portion of the screen. To view the documentation in PDF, select View PDF. To clear the filters, select Clear Section Filters.
•Report Search: Select Report Search to view a complete list of available reports. TIP: The Clin Doc Documentation Status Report may be run to display all signed/unsigned and complete/incomplete Documentation documents.
•Change Date/Time: Allows a user to adjust the date and time of documentation.
•Quick Add: This button allows you to quickly add a free text note at the bottom of the document.
•Show More: This option allows sections, questions and answers, that have been hidden, to display. Once Show More is selected, the option to Show All may become available, where additional comprehensive questions and answers will display.
•Inpatients: This button displays Phys Doc application documents.
For more information, see the Documentation Module User Guide.