|
<< Click to Display Table of Contents >> Drop-Down Box |
  
|
|
<< Click to Display Table of Contents >> Drop-Down Box |
|
Drop-down boxes may be used when the appropriate answer will be chosen from a pre-built list. Only one answer may be selected per question. Drop-down lists are created on the Electronic Forms Selection Screen. In order to add a drop-down control to a form, the Drop-down must first be created. See New Drop-down List in the next section to create the list.
1.Select New Control.
2.Select Drop-down Box.
3.The Drop-down Maintenance screen will appear.
Select Electronic Form Maintenance > Electronic Form > New Control > Drop-down Box
Drop-down Box
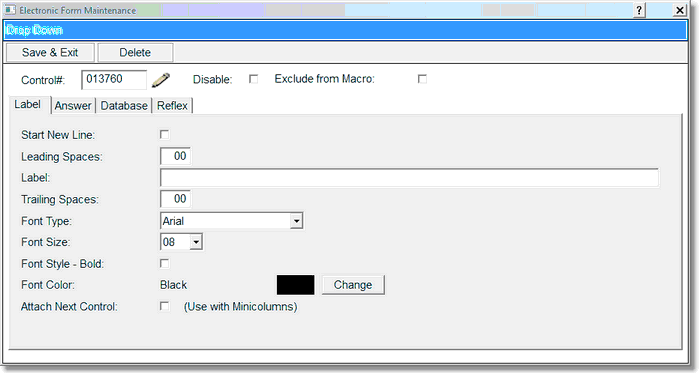
4.Select Disable if the Drop-down Box is to be inactive on the electronic form but is not to be deleted from the setup. A disabled control will have an asterisk (*) appear next to the control number.
5.If the entry is to display on a new line, select Start New Line.
6.Enter the appropriate number of spaces before the Drop-down box by selecting Leading Spaces.
7.Enter the description of the drop-down box in the Label field. The description entered in the label field will display on the Electronic Form.
8.Enter the trailing spaces by selecting the Trailing Spaces field.
9.Set the font, if different than the default, by selecting the Font Type field.
10.To change the font setting, select the Font Size field.
11. For the font to display in bold, select the Font – Bold field.
12. If the font is to display in a color, that is not the default setting, select Change in the Font Color field.
13. Select the Answer tab to select the Drop-down list that will be used for the answers for the drop-down box.
Select Electronic Form Maintenance > Electronic Form > New Control > Drop-down > Answer
Drop-down Answer
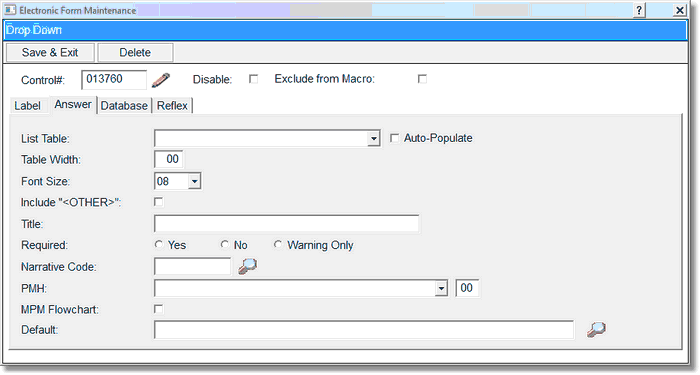
14.Select the arrow on the List Table field to see the Drop-down lists available. Select a drop-down list to add to the field.
15.If the Physician or Employer Table is selected, the form may be set to Auto-Populate text boxes with the Physician's or Employer's Address, Phone Number and DEA number. Detailed instructions for this feature are located in the Auto Populate section of this chapter.
16.Select the Table Width field to set the width of the answer field on the Electronic Form. The width should be wide enough for the longest answer.
17.To set the font size, select the Font Size field. The options are 06, 08, 10, and 12.
18.To have the option to free text in an answer, select the Include “<OTHER>” field. When Other is selected an answer may be typed in on the form.
19.The Answer Title field may be used to enter a description that will display on the Changes Detail screen when charting on the patient on the Electronic Form. The title must be re-keyed in this field if the drop-down is set to Required or have a Warning appear if the question is not addressed on the patient's form.
20.If Required is selected for the control, the user will not be able to go to another page, print, lock or exit the form without addressing the appropriate field(s). If Warning Only is selected, the user is given a prompt that this question should be addressed on the form, but TruBridge EHR will allow going to the next page, printing, locking or exiting the form without addressing the field. The popup message will let the user know what is required by the title which is entered on the answer title field. The title must be re-keyed in this field if the drop-down is set to Required or have a Warning appear if the question is not addressed on the patient's form.
NOTE: Currently, if the form is a multiple page form and all pages are not accessed, TruBridge EHR will not prompt the user that there are required or warning only controls set up on pages that are not accessed. However, if the user does access the other pages, the appropriate prompts will display.
21.The Narrative Code and PMH fields are no longer used.
22.Default: Select the magnifying glass and select an answer. If a default answer is selected, this will be the answer that appears on the form when it is opened on a patient.
23.Select the tab marked Database.
Select Electronic Form Maintenance > Electronic Form > New Control > Drop-down > Database
Drop-down-Database
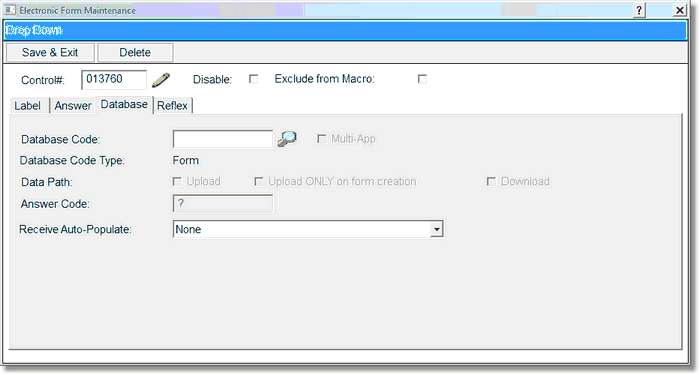
24.Select the magnifying glass that is beside the Database Code field to add a database code to the field.
25.Select the Data Path. The Data Path field has three options:
•Upload will load information from TruBridge EHR to the Electronic Form.
•Download will load information from Electronic Forms to TruBridge EHR.
•Upload ONLY on form creation will populate the radio button if there is already an answer supplied for the patient in TruBridge EHR or on another form associated with this code upon opening the form for the first time only.
NOTE: To change the code to a Multi-Application code so that the answer may populate the POC Flowchart, select the Multi-App check box after loading the form/formless database code.
26.Select the Reflex tab.
27.Enter the appropriate reflex code in the first available field or select the magnifying glass to access the Reflex Look-up, a maximum of three reflexes may be set per control. (Please refer to the Reflexing Chapter for more information on reflexing.)
28.An (R) appears on the maintenance screen when a Drop-down control has a reflex code in the setup.
29.To save the setup, select Save & Exit.
30.To exit no update, select Delete.
To create a New Drop-down list see Drop-down Lists.