|
<< Click to Display Table of Contents >> Charting Using a Markup Area |
  
|
|
<< Click to Display Table of Contents >> Charting Using a Markup Area |
|
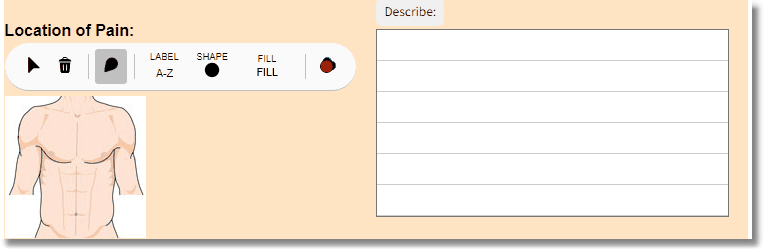
The Markup Area is the area on the Electronic Form where the an image is displayed for charting.
1.The Image Tool will display when the markup image is hovered with a mouse.
2.The Place Mark icon is selected by default when the form is opened. Selecting within the markup area will place a label in the area that is selected.
3.If a label was placed incorrectly on the image, select the Pointer icon, then select the label that should be removed. Next, select the Delete icon to remove the erroneous label.
4.The Label Type icon controls the label that is placed within the mark. It defaults to A-Z when the form is opened, but may be changed to numeric digits 1-9 by selecting the icon.
5.The Shape Type icon controls the shape of the mark used within the markup area. It defaults to a circle but may be changed to a square or a line by selecting the icon.
6.The Fill icon controls if the mark displays as a solid or an outline. It defaults to a solid fill but may be changed to outline or no fill.
7.The Color icon controls the color of the mark placed. It defaults to red when the form is opened, but may be changed by selecting the color icon to change to the desired color. The available colors are green, blue, yellow, aqua, and black.
8.Continue to use the markup area as needed.
Select Charts > Select Patient > Electronic Forms > Markup
Markup