|
<< Click to Display Table of Contents >> Creating New Whiteboard List Filters |
  
|
|
<< Click to Display Table of Contents >> Creating New Whiteboard List Filters |
|
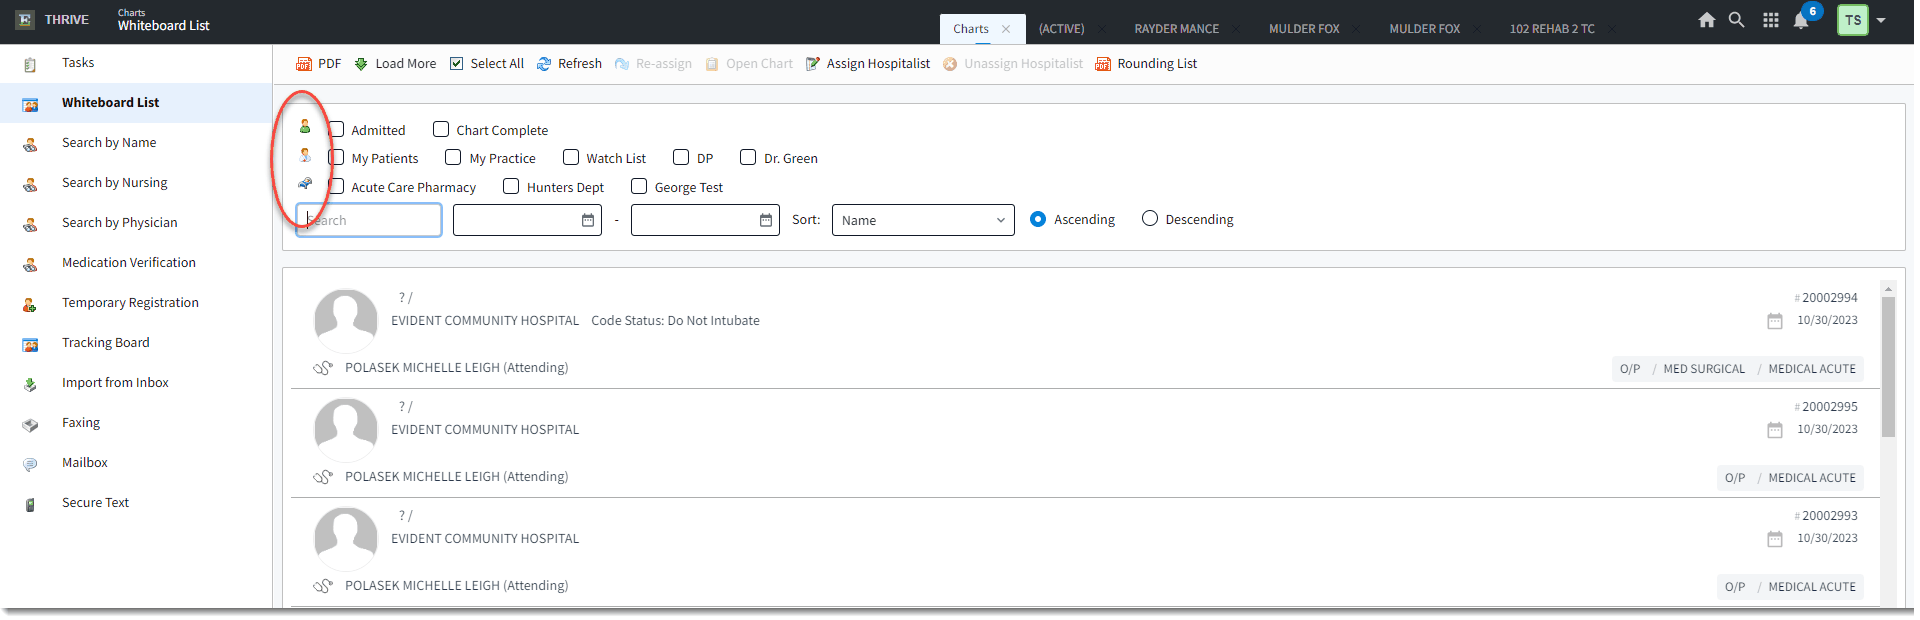
The Whiteboard List filters can be customized by adding existing filters or creating new filters. Filters are set with defaults that will allow the provider to select/deselect the filter check boxes to change the display of the Whiteboard.
To add or create a new filter, select the icon next to the desired type of filter.There are three filter types:
•![]() Patient Filters allow the provider to create a list based on patient demographic information. Examples: Stay Type, Sub Type, Service Code, Admission / Discharge Status, Gender, etc.
Patient Filters allow the provider to create a list based on patient demographic information. Examples: Stay Type, Sub Type, Service Code, Admission / Discharge Status, Gender, etc.
•![]() Physician Filters display the list of patients according to the physicians listed on the patient record. The defaults include the My Patients and My Practice Patients options. Additional filters may be created if the provider wishes to see patients that have another user listed as the Physician of Record.
Physician Filters display the list of patients according to the physicians listed on the patient record. The defaults include the My Patients and My Practice Patients options. Additional filters may be created if the provider wishes to see patients that have another user listed as the Physician of Record.
•![]() Location Filters can be created to see patients according to the department to which their room number is associated.
Location Filters can be created to see patients according to the department to which their room number is associated.
Whiteboard List
You can add a new filter either by choosing an available filter or by creating a new filter and adding that one. To do either, start by selecting the Add button.
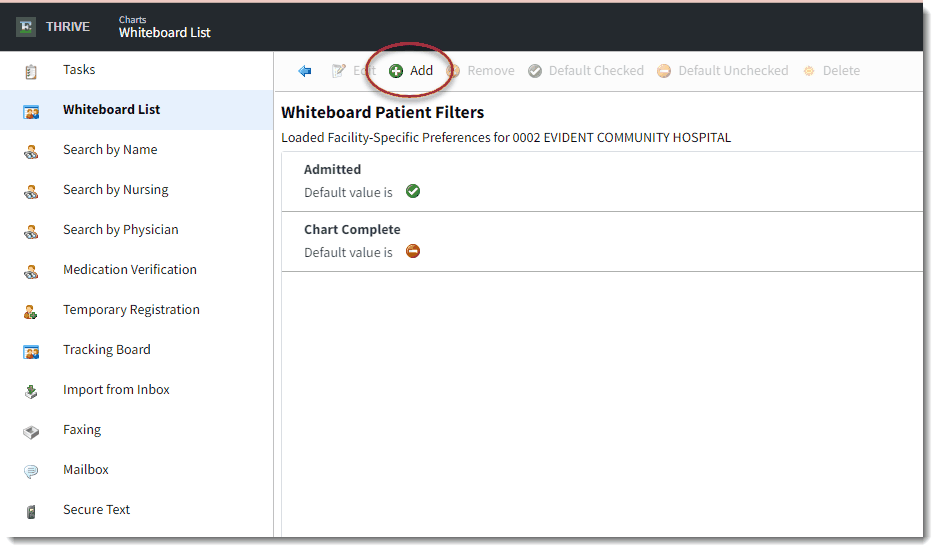
Whiteboard Patient Filters
If users have appropriate user security, they can add, remove, change defaults, and edit filters that are user-specific. If the behaviors to edit filters have not been granted, users will be unable to make changes or add user-specific filters.
1.To add an available filter, select the desired filter icon [![]() ,
, ![]() , or
, or ![]() ]. The Whiteboard Filters list is displayed. These are the filter options currently available on your whiteboard.
]. The Whiteboard Filters list is displayed. These are the filter options currently available on your whiteboard.
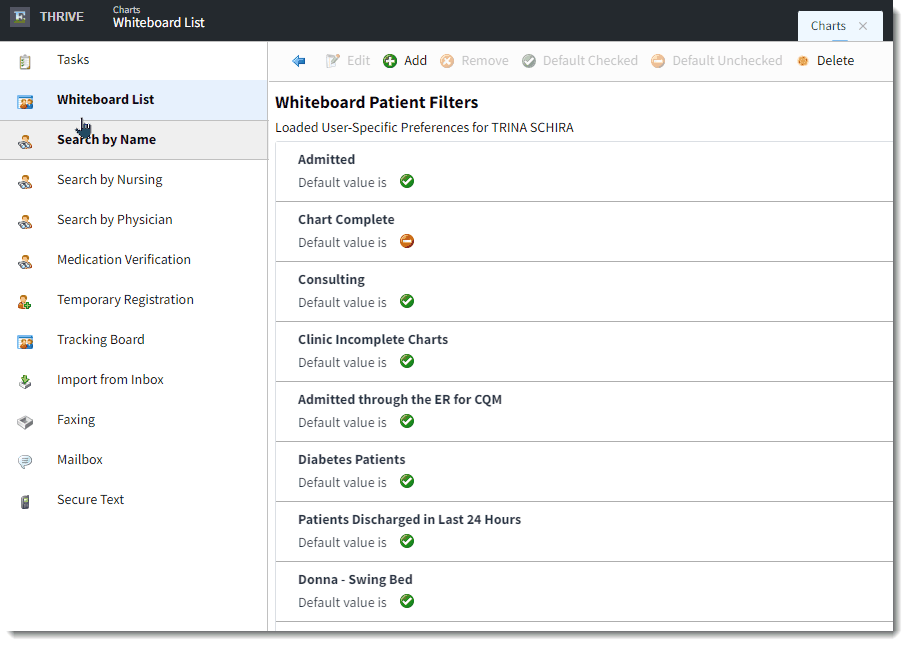
Whiteboard Patient Filter List
2.Select Add. A list of available filters is displayed. If desired, sort the list by selecting one of the column headers (Description, Default, Last Change, or Changed By).
3.Use the Search field to locate the desired filter. To select the filter, double-click it or select the filter and select OK. The filter is added to the Whiteboard Patient Filters list.
NOTE: Options with green check marks will default to checked on your Whiteboard. Options with red icons will default to unchecked. If you'd like to change this setting, select the item to highlight it, then select either the Default Checked or Default Unchecked options.
4.Select the blue back button to return to the Whiteboard. The filter is now displayed as an option and checked or unchecked by default based on your selections.
You can create new filters based on available database fields and the selected criteria and parameters you set for that field. If users have appropriate security, they can add, remove, change defaults, and edit filters that are user-specific. If the behaviors to edit filters have not been granted, users will be unable to make changes or add user-specific filters.
1.To create a new patient filter, select the desired filter icon [![]() ,
, ![]() , or
, or ![]() ]. The Whiteboard Filters screen is displayed.
]. The Whiteboard Filters screen is displayed.
2.Select Add. A list of available filters is displayed. If the desired filter is unavailable and you want to create a new filter, select New from the action bar. The Filter Title screen is displayed.
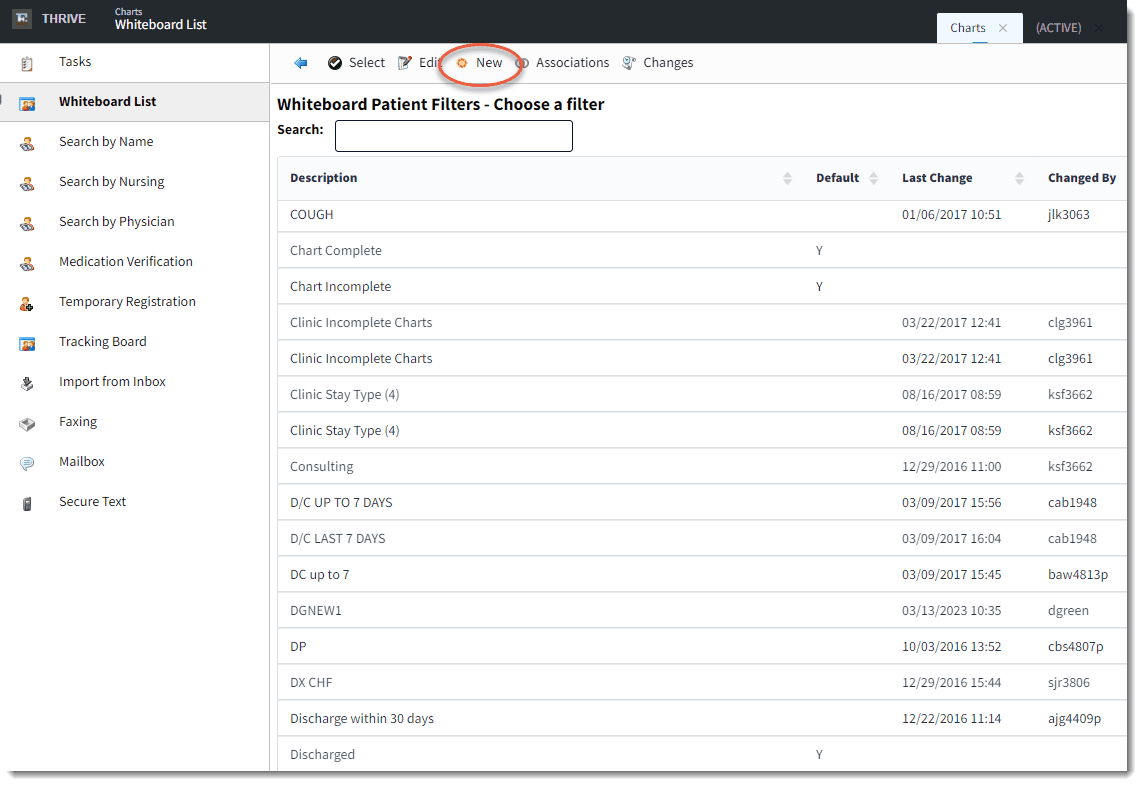
Choose a Whiteboard Patient Filter
3.Select (Filter Title) and enter a descriptive title for the filter that will make it easily identifiable by other users. Select OK.
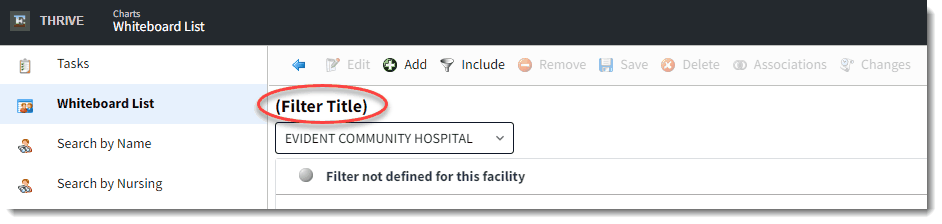
New Filter
4.Select Add. A list of database fields/codes that are available to add to the filter is displayed. Use the Search field to locate the desired field/code. Double-click to select it OR select the field and select OK.
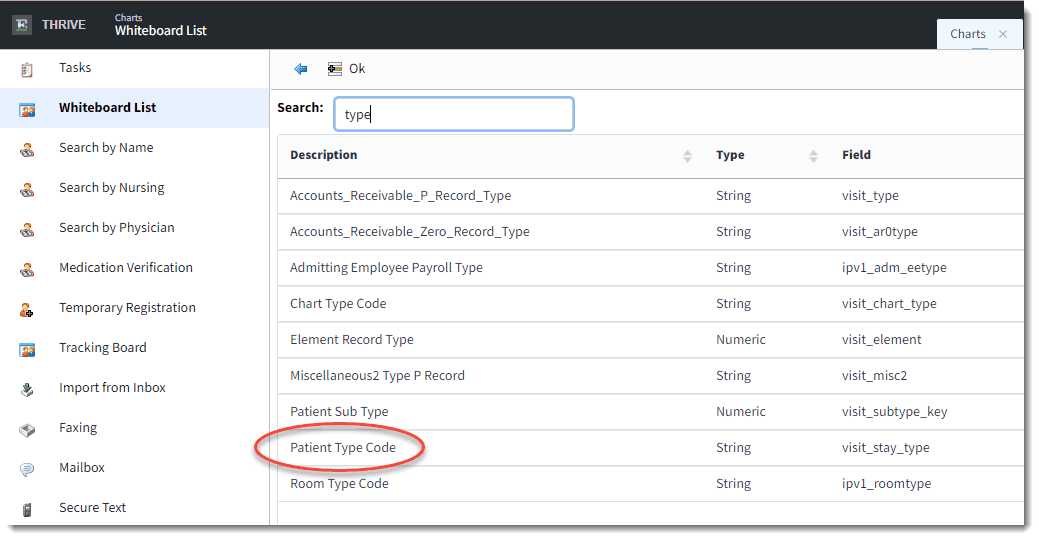
Configure Filter
5.The criteria options are displayed based on the type of database field you selected. For example, if you select a date field, options are displayed for you to select an absolute date, or days, hours, months, etc. elapsed since the selected date you specify. Select the Value Type and select OK. If you select a field based on a value (age, weight, attending physician, etc.), you will likely determine if the result is equal, not equal, greater than, or less than a value that you specify. Select the appropriate qualifier (is equal to, is not equal to, is less than, etc.).
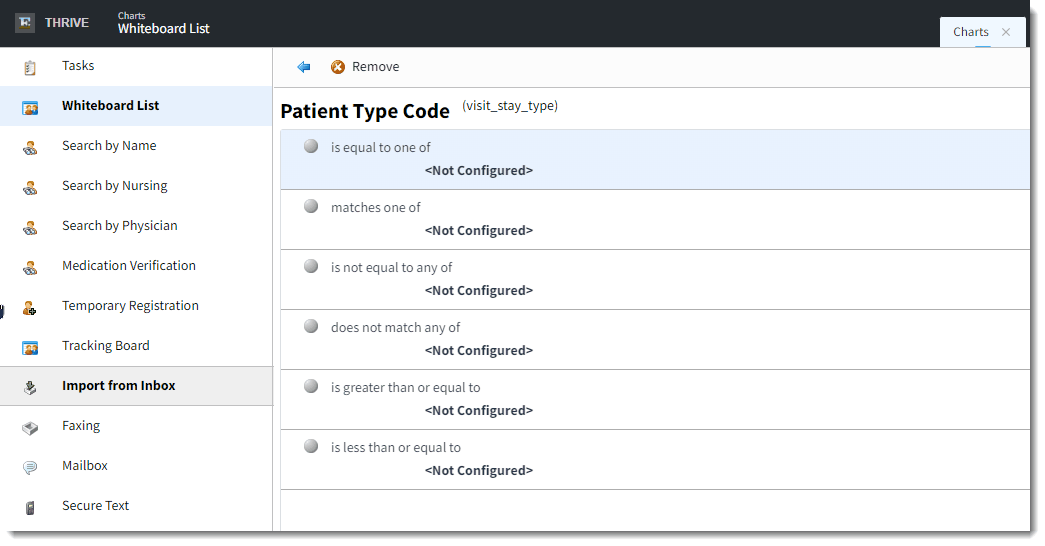
Patient Type Code
6.Enter the value in the Enter Value(s) field (at the bottom of the screen) and press <Enter> on the keyboard. This is a free text field and will allow the input of values specific to the facility. For the example below, the filter will reflect patients with Patient Type Code equal to 4.
NOTE: If assigning multiple values to one filter, use the <Enter> key on the keyboard after each entry or separate multiple values with commas in between.
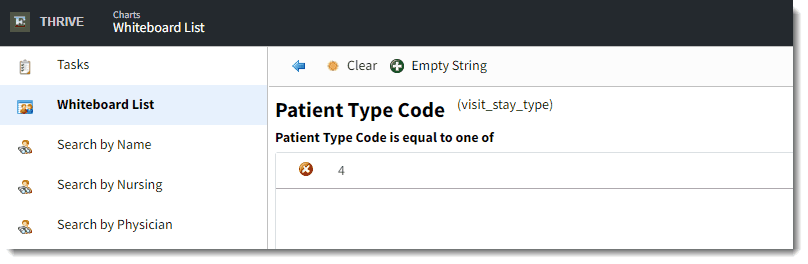
Patient Type Code - Configuration
7.Once all values have been entered, use the blue arrow to exit back to the configuration screen. If needed, you can add additional criteria for this database field/code. If no other criteria need to be set, select the blue back arrow again to go to the filter details.
8.Select a Filter Method (at the bottom of the screen). Select if the filter will apply to patients that meet ANY of the criteria or if the patient has to meet ALL of the criteria in the filter configurations.
9.Select Save. If you'd like to add additional database fields to this filter, select Add and repeat steps 4-9.
10. Select the blue back button to return to the available filters - choose a filter list.
11. Locate the filter that you just created using the Search field. Double-click to select the filter or select the filter and select OK. The filter is added to the Whiteboard Patient Filters list.
NOTE: Options with green check marks will default to checked on your Whiteboard. Options with red icons will default to unchecked. If you'd like to change this setting, select the item to select/highlight it, then select either the Default Checked or Default Unchecked options.
12. Select the blue back button to return to the Whiteboard. The filter is now displayed as an option and checked or unchecked by default based on you selections.