|
<< Click to Display Table of Contents >> Scheduling an Existing Patient |
  
|
|
<< Click to Display Table of Contents >> Scheduling an Existing Patient |
|
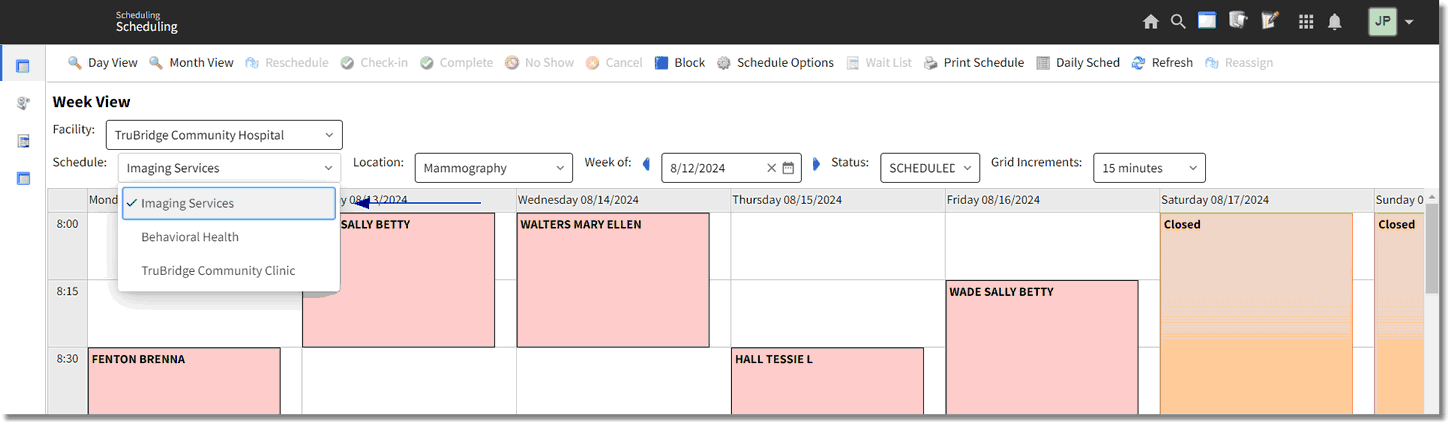
To begin scheduling a patient, select the schedule from the Schedule drop-down.
Select Web Client > Scheduling
Appointment Scheduling
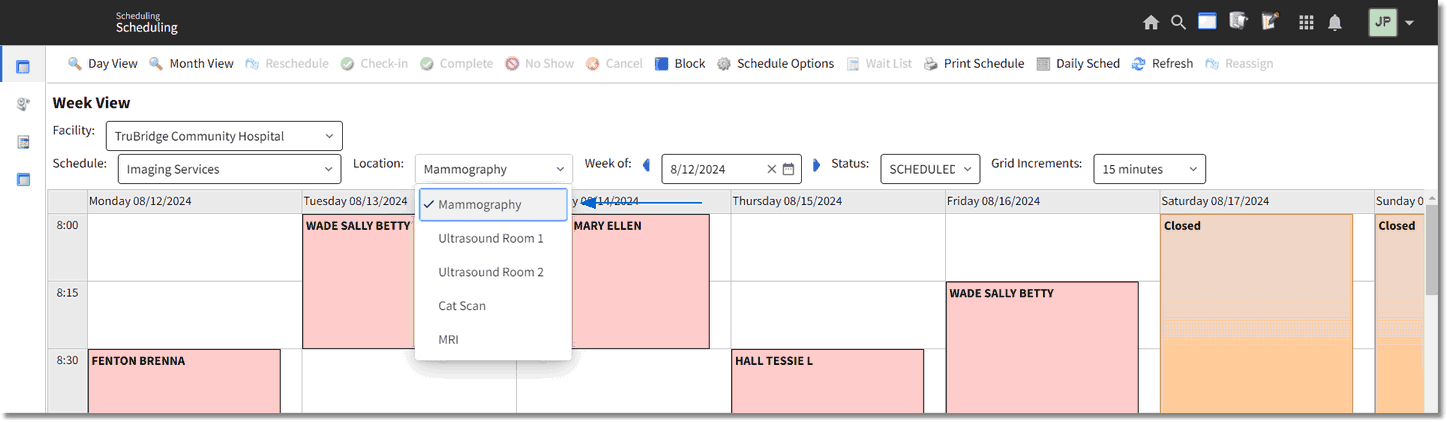
Select the resource from the Location drop-down.
Select Web Client UX > Scheduling
Schedule
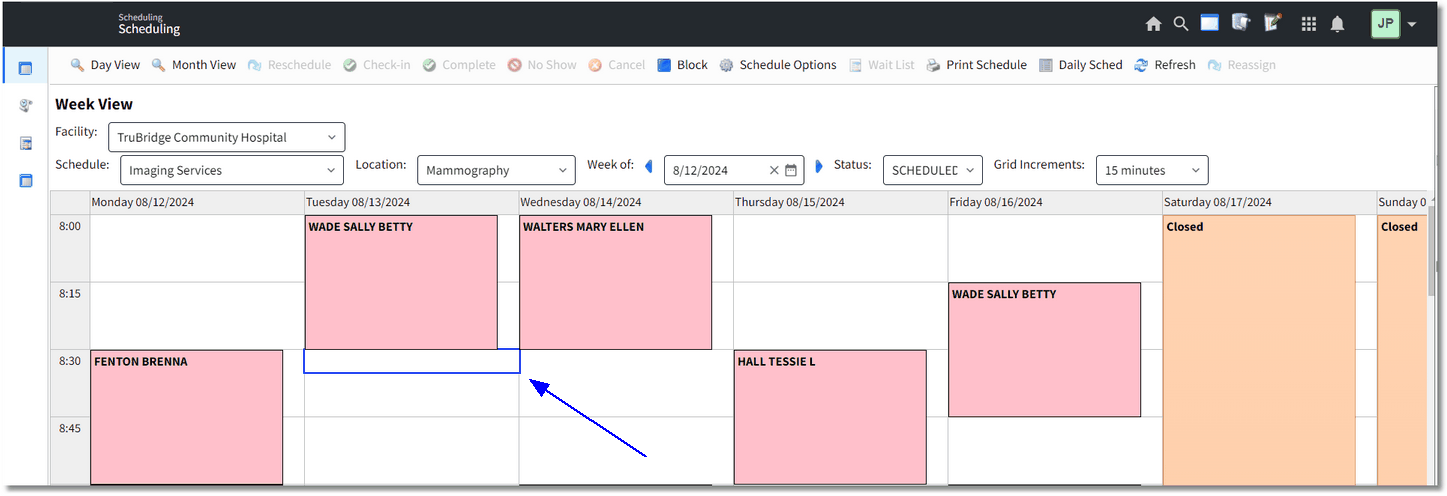
Select the week for the schedule to display. The scheduling grid will automatically default to the current week.
NOTE: Whichever date is selected, the scheduling grid will start with the Monday date of that week when in the Weekly View.
Select Web Client > Scheduling

Schedule
Place the cursor in the date and time on the grid for when the schedule is and double-click. If the patient is already scheduled for the same day and time in the current location or another location, a warning will display, "Patient is currently scheduled for this date and time. Do you wish to schedule anyway?" Select Yes to continue or No to return to the scheduling grid.
NOTE: Warnings will display when a time slot is selected and the maximum total number of patients scheduled for that day have been reached and/or the maximum total number of patients that may be scheduled simultaneously for that time slot have been reached. If the Overbook Appointments behavior control is set to allow in Identity Management, the scheduler will have the ability to override/overbook the appointment being created.
Select Web Client > Scheduling
Schedule
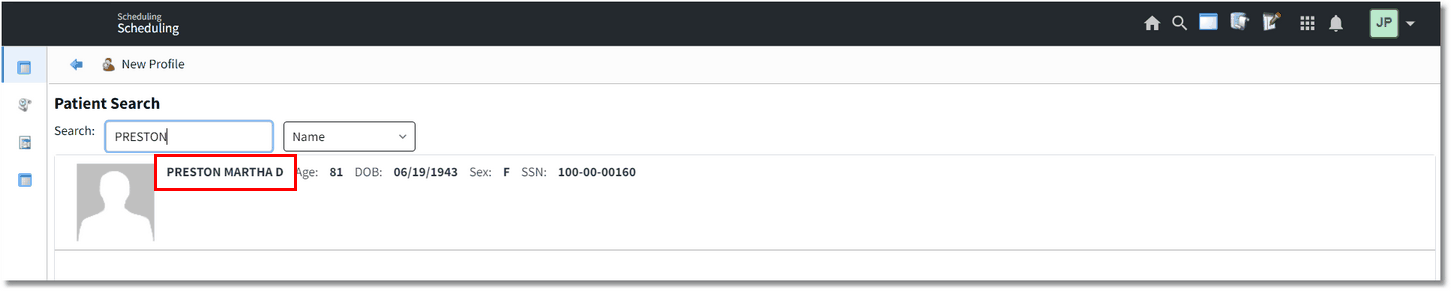
Search for a patient by Date of Birth or Name. The screen will list existing profiles that match the search criteria provided. If the search provides the correct patient, double-click on the name of the correct patient.
NOTE: The last element (Name or Date of Birth) that was selected will remain the search criteria element the next time a patient is scheduled. This functionality will be based per user login.
Select Web Client > Scheduling > Select Date and Time > Schedule
Schedule - Patient Search
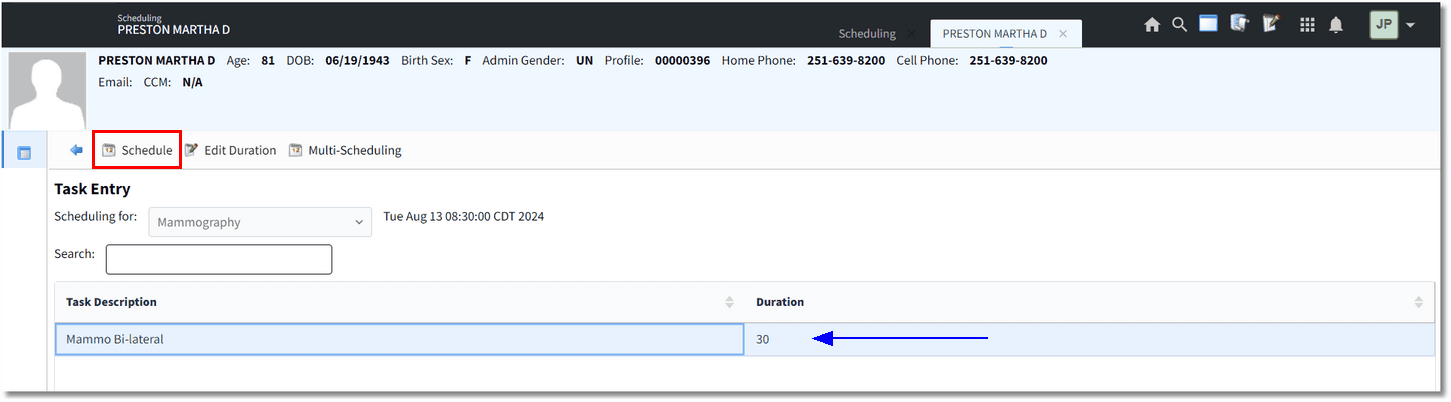
Select a Task for the resource selected and then select Schedule. If wanting to change the duration of the task before scheduling, select the task and then select Edit Duration from the action bar.
NOTE: If a Patient Note exists on the Patient's Profile, it will display at this time. The Patient Note is view only and may not be modified or deleted within the Scheduling application.
Select Web Client > Scheduling > Select Date and Time > Schedule > Select Patient
Schedule - Task Entry
The system will then go to the Event screen. Fill out the Event screen and select ![]() Update to save the information. Select the back and the scheduled patient's name will display on the scheduling grid.
Update to save the information. Select the back and the scheduled patient's name will display on the scheduling grid.
NOTE: Please refer to the Event Screen section of this user guide for information on how to complete this screen.