|
<< Click to Display Table of Contents >> Check-In for Clinics |
  
|
|
<< Click to Display Table of Contents >> Check-In for Clinics |
|
The Check-In option will function differently for clinic locations utilizing TruBridge Provider EHR. The Check-In option will be used to place the patient onto the Clinic Tracking Board to notify medical staff of when the patient has arrived for their appointment. This option is also available from the daily and weekly views on the scheduling grid.
This option will only be available if the scheduled patient has a registered clinic account linked to it and the location of the appointment is marked as a Clinic Location in the Locations or Personnel tables. For more information on how to link an account, please see the Registering and Linking Accounts section of this user guide.
Once ![]() Check-In is selected, the Patient Location Maintenance screen will display.
Check-In is selected, the Patient Location Maintenance screen will display.
Select Web Client > Scheduling > Select Appointment > Check-In
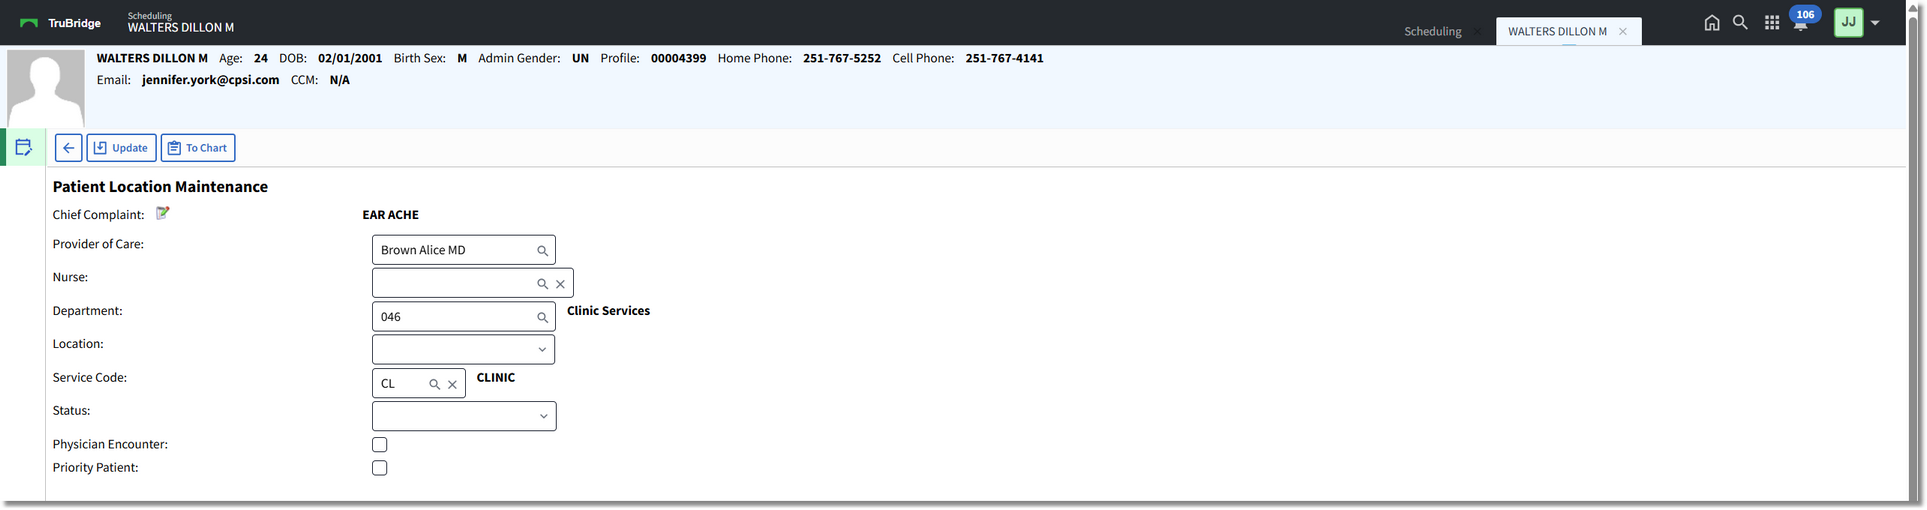
Patient Location Maintenance
The Provider of Care will pull from the linked account and the Department will default to the department the user is logged in to (typically, this will already be the clinic department number).
Select the Location drop-down and select Waiting Room. Then select the Status drop-down and select Ready for Room. The Service Code will default to the code on the linked account, but may be changed if needed. Select ![]() Update to then place the patient on the Clinic Tracking Board and exit back to the Scheduling application.
Update to then place the patient on the Clinic Tracking Board and exit back to the Scheduling application.
A ![]() green mark will appear next to the patient's name on the scheduling grid once the Check-In process has been completed.
green mark will appear next to the patient's name on the scheduling grid once the Check-In process has been completed.
NOTE: Once the Check-In option is selected, it will change to Reverse Check-In. Select Reverse Check-In if the Check-In option was selected in error. For clinic locations, Reverse Check-In will remove the patient's appointment from the Clinic Tracking Board. It will also remove the green mark on the scheduling grid and move the patient's appointment to its previous status.