|
<< Click to Display Table of Contents >> Lookup Box |
  
|
|
<< Click to Display Table of Contents >> Lookup Box |
|
The Electronic Form may be set up with the Lookup Box which lists allergies, diagnosis, immunizations, physicians and medications.
1.Select New Control.
2.Select Lookup Box.
3.The Lookup Box Maintenance screen will display.
Select Electronic Form Maintenance > Electronic Form > New Control > Lookup Box

Lookup Box
4.Select Disable if the Lookup Box is to be inactive on the electronic form but is not to be deleted from the setup. A disabled control will have an asterisk (*) appear next to the control number on the Electronic Form Maintenance display. When the form is previewed, the control will not appear on the form.
5.If the entry is to be on a new line in the Electronic Form, select Start New Line.
6.Select the Leading Spaces field and enter the number of spaces before the lookup box.
7.To enter the description of the lookup box, select the Label field and type the description.
8.Select the Trailing Spaces field and enter the number of spaces after the lookup box if more than 01 is needed.
9.If the font style is to be different than the default style, select the Font Type field.
10.To set the font size, if different than the default, select the Font Size field.
11.Select the Font Style – Bold field if the text is to display in bold font.
12.To select a font color different than the default, select the change area next to the Font Color field.
13.Select the Answer Format tab to associate a lookup table to the setup.
Select Electronic Form > New Control > Lookup Box > Answer
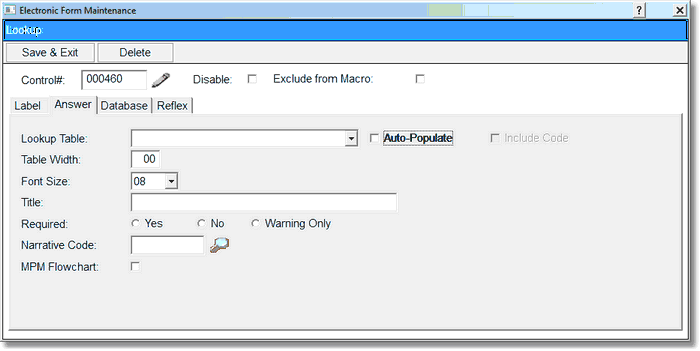
Lookup Box Answer
14.Select the Drop-down arrow in the Lookup Table field to select the appropriate lookup table for the setup. Current options are Allergies, Diagnosis, Medication Formulary, Immunizations, All Physicians, Staff Physicians, and Non-Staff Physicians .
15.Select the Table Width field to set the character width of the lookup box.
16.If the font size is to be different than the default, select the Font Size field.
17.Enter a Title that will be seen in the Changes Detail screen on the patient.
18.If applicable, select Yes, No, or Warning Only in the Required field. If the question is required, a title must be entered so that the user will know which question requires their attention.
NOTE: Currently, if the form is a multiple page form and all pages are not accessed, TruBridge EHR will not prompt the user that there are required or warning only controls set up on pages that are not accessed. However, if the user does access the other pages, the appropriate prompts will display.
19.The Narrative Code and MPM Flowchart fields are not in use any longer.
20.Select the Database tab to associate a database code to the lookup box.
Select Electronic Form > New Control > Lookup Box > Database
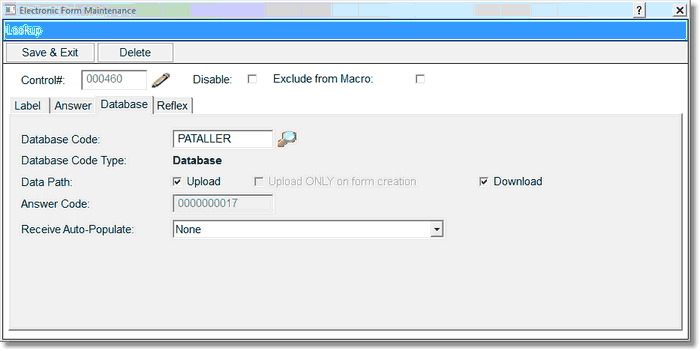
Lookup Box Database
21.To associate a database code to the lookup box, select the magnifying glass icon next to the Database Code field. Multi-application codes cannot be used with a Lookup Box.
22.To have the information upload or download to the form, select the Data Path field. Select the Data Path to have information pull to the Electronic Form or download from the Electronic Form to TruBridge EHR. The Data Path field has three options. Upload will load information from TruBridge EHR to the Electronic Form. Download will send information from the Electronic Form to TruBridge EHR. Upload ONLY on form creation will populate the text box if there is already an answer supplied for the patient in TruBridge EHR or on another form associated with the database code on the first time the form is opened only.
23.To save the setup, select Save & Exit. To exit without saving, select Delete.