|
<< Click to Display Table of Contents >> Markup Area |
  
|
|
<< Click to Display Table of Contents >> Markup Area |
  
|
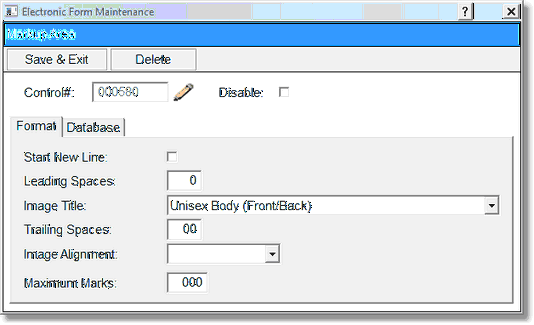
The Electronic Form may be set to display images such as body parts to illustrate cuts, wounds or bruises. This feature is called a Markup Area. The Electronic Forms software will allow a maximum of fifteen markup areas to be set up per page. The list of currently available Markup Areas is seen by selecting the arrow in the Image Title field.
1.From the Electronic Form Maintenance screen select New Control.
2.From the New Control Maintenance screen, select Markup Area.
3.Select Disable if the Markup Area is to be inactive on the electronic form but is not to be deleted from the setup. A disabled control will have an asterisk (*) appear next to the control number on the Electronic Form Maintenance display.
4.From the Markup Area Maintenance screen select Start New Line if the image is to be entered on a new line.
5.Enter the number of spaces before the image by selecting the Leading Spaces field.
6.Select the Image Title field and Drop-down arrow to select the image to display on the Electronic Form.
7.Enter the number of spaces after the image by selecting the Trailing Spaces field.
8. The Image Alignment and maximum number of marks is not functioning at this time.
9.To save the image, select Save & Exit. To exit without updating, select Delete.
Select Electronic Form Maintenance > Electronic Form > New Control > Markup Area

Markup Area