|
<< Click to Display Table of Contents >> Mini-Columns |
  
|
|
<< Click to Display Table of Contents >> Mini-Columns |
|
To set up a mini-column within Electronic forms:
1.Select New Control.
2.Select Layout Control.
Select Electronic Form Maintenance > Electronic Form > New Control > Layout Control
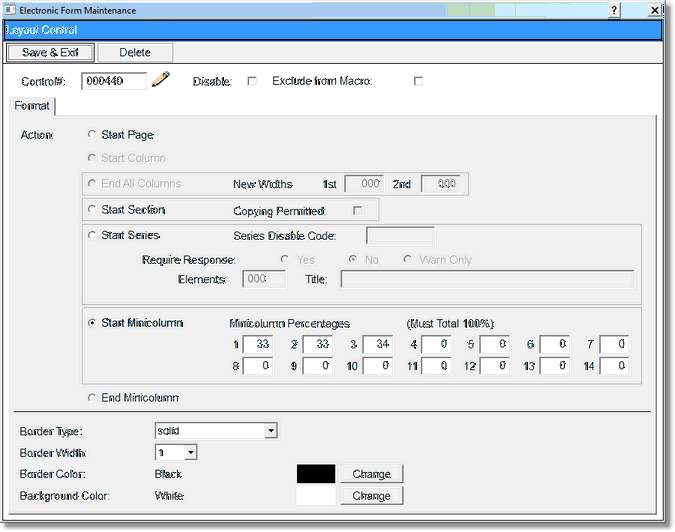
Layout Control
3.Select Disable if the Layout Control is to be inactive on the electronic form but is not to be deleted from the setup. A disabled control will have an asterisk (*) appear next to the control number on the Electronic Form Maintenance display.
4.Select Start Mini-column.
5.Set the size of columns by entering in the Mini-column Percentages. The total must equal 100%. For example, if there will be three columns, the widths may be 33, 33, and 34. A maximum of 14 Mini-columns may be set up per table.
NOTE: The total width of each box answer size and number of characters in each label must not exceed 100 if using a font size of 8. If a font size greater than 8 is used, then the total number of characters and answer widths should be decreased by 5 characters per increase in font size in order to maintain the mini-column within the margins. When adding a mini-column to a 2 column section of the form, the total for the mini columns must still equal 100% in the mini-column layout control. When the controls are entered, the total width of all the columns in 1 row must not exceed 50 characters based on a font size of 8.
6.Select Save & Exit to save the information. To exit without saving, select Delete.
7.Once Save & Exit is selected, the Auto Create Mini-column grid screen will display. This is a tool used to create a grid of blank text boxes for documentation purposes. This may be used to create such things as a grid to enter multiple sets of vital signs or a table for multiple sets of therapy exercises.
Select Electronic Form Maintenance > Electronic Form > New Control > Layout Control > Minicolumn > Save & Exit
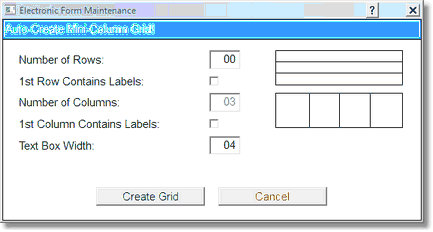
Auto-Create Mini-Column Grid
8.The auto-create grid will automatically build a mini-column that will be made of text boxes and text labels.
▪ Number of Rows sets the number rows displayed in the mini-column
▪1st Row Contains Labels if checked will automatically insert text labels in the first row
▪Number of Columns sets the number column displayed in the mini-column. This field will always be disabled, the column number is set up in the Layout Control when setting up the mini-column
▪1st Column Contain Labels if checked will automatically insert text labels in the first column
▪Text Box Width sets the size of the text boxes that will be automatically inserted into each row and each column .
9.If the auto-create mini column grid does not need to be used, select Cancel.
10. Continue entering controls into the mini-column by selecting New Control.
NOTE: When building a mini-column, TruBridge EHR places controls left to right then drops down to the next line. The “attach next control” option on many of the controls is used when multiple controls should display in the same column. If a blank space is needed to fill a mini-column, a blank text label may be used.
11.Once all controls have been placed in the mini-column, enter an End mini-column control.
To set up an End Mini-column:
1.Select New Control.
2.Select Layout Control.
Select Electronic Form Maintenance > Electronic Form > New Control > Layout Control
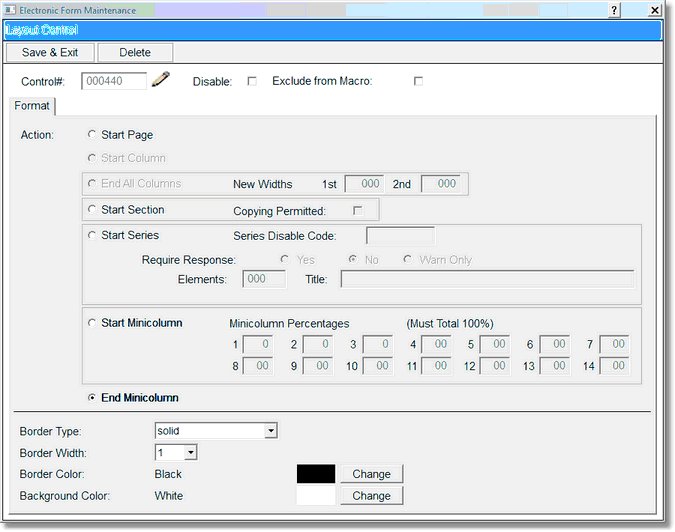
Layout Control
3. Select End Minicolumn.
4. Select Save & Exit to save the information. To exit no save, select Delete.