|
<< Click to Display Table of Contents >> Additional Options |
  
|
|
<< Click to Display Table of Contents >> Additional Options |
|
After selecting Run Report, the following information will display:
•Patient Name
•Medication Description
•DOB
•Visit #
•Phone Number
•Drug Class
•Start Date
•Stop Date
•DEA Class
•Sample Lot #
•Lot Expiration
•Message ID
•Electronic Status
•Prescribing Method
•Delivery Method
•Pharmacy
•Prescribing Physician
•Supervising Physician
•Entered By
•Discontinued By
The Delivery Method shows the following information:
•If Delivery Method is Print, the Printer Number to which the prescription was sent will display.
•If Delivery Method is Electronic, the Pharmacy selected will display.
•If Delivery Method is View, delivery method will show as "Viewed."
•If Delivery Method is Fax, the Fax Number to which the prescription was sent will display.
•If Delivery Method is No Rx Needed, delivery method will show as "No Rx Needed."
NOTE: If no Delivery Method check boxes were selected, all methods will be included in the report.
The Electronic Status check boxes allow the user to filter the results by Pending, Complete, and/or Error. If none are checked, all statuses will be included in the report.
The Sort option allows the user to sort by the following: DEA Class, Description, Drug Class, Entered By, Patient Name, Pharmacy Name, Prescribing Method, Prescribing Physician, and/or Supervising Physician.
The Search field allows the user to free text and select from the following options: DEA Class, Description, Drug Class, Entered By, Patient Name, Pharmacy Name, Prescribing Method, Prescribing Physician, Supervising Physician
If checked, the Controlled Substances Only check-box will delimit the report so that it only pulls controlled substance prescriptions.
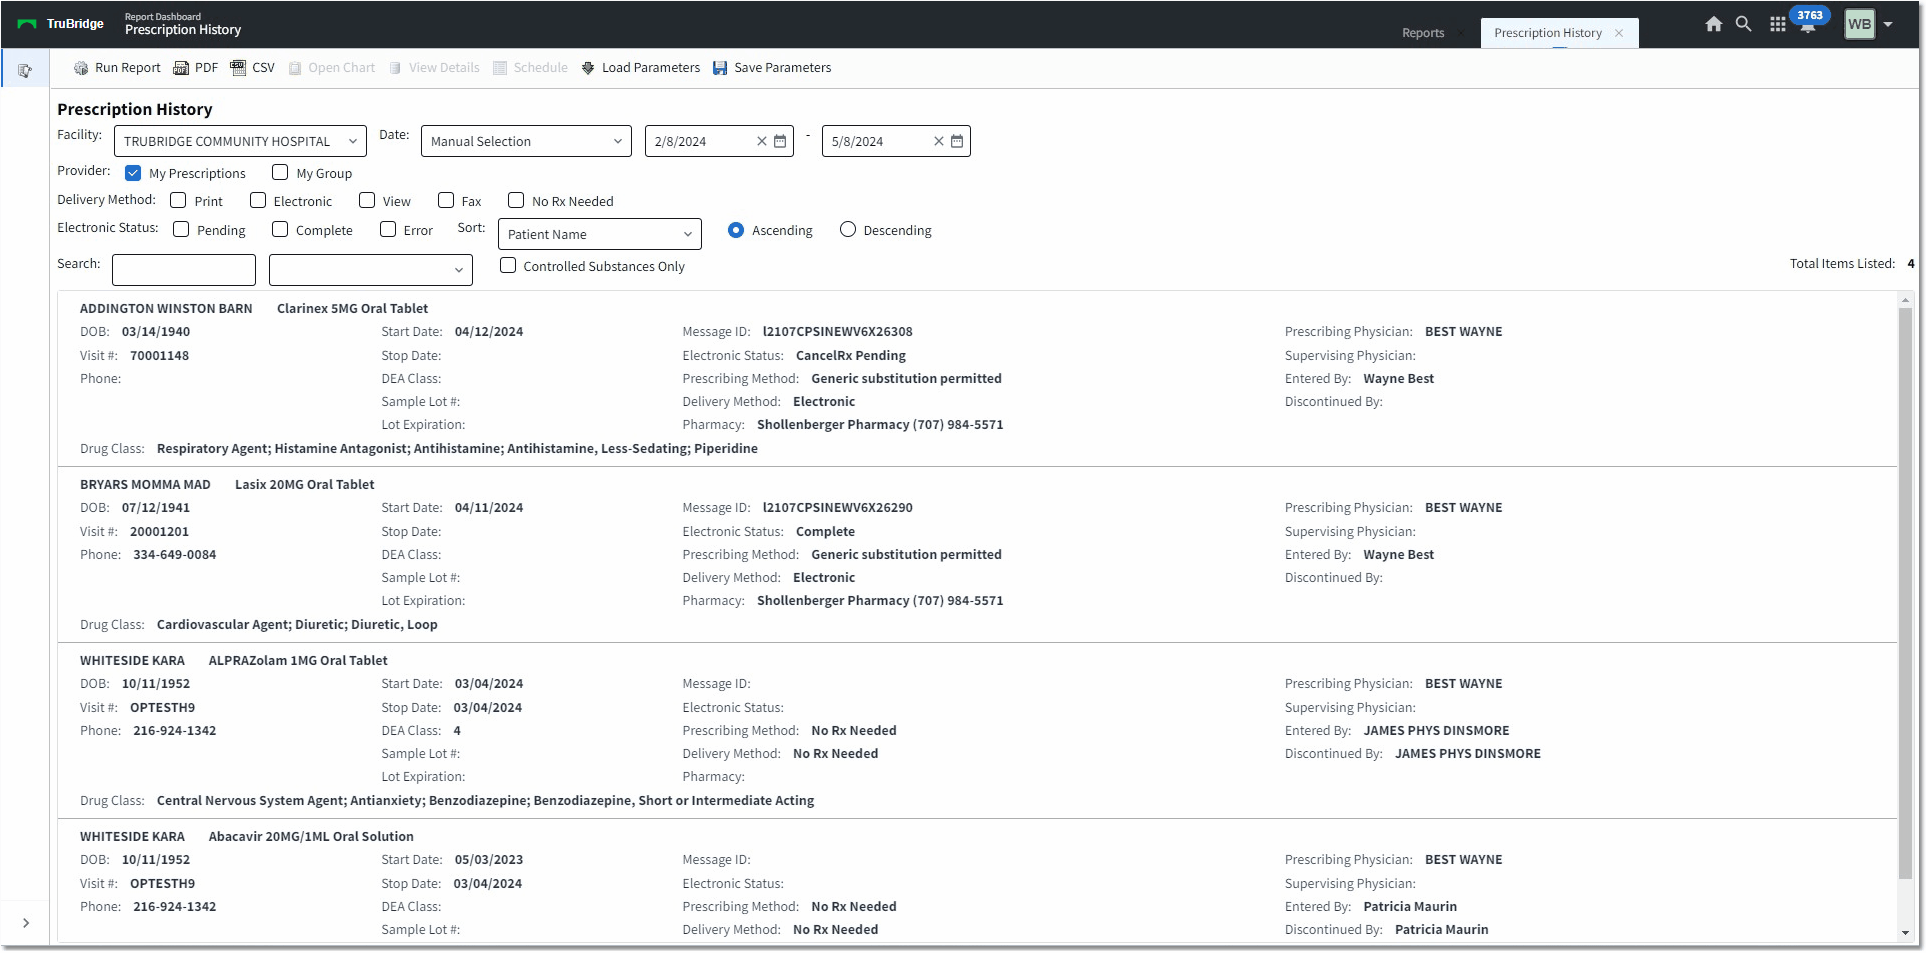
Prescription History
The action bar options include the following:
•Run Report: Select this option to generate the report based on the selected parameters and criteria.
•PDF: Select this option to generate a PDF copy of the report.
•CSV: Select this option to generate a CSV version of the report.
•Open Chart: Select this option to display the patient's chart and launch Prescription Entry.
•View Details: Select this option to display all messages associated with the selected prescription criteria.
•Schedule: Select this option to set up the report in Report Scheduler.
•Save Parameters: Use this option to save the selected parameters for future use. After selecting the Save Parameters button, enter a name for the saved parameters in the Parameter Set Name field and select Save. Then, to use the saved parameters again, select the Load button and choose the appropriate saved parameter name from the list. To delete saved parameters you no longer need, select them from the list and select Delete.
•Load Parameters: If you have previously saved certain parameters (using the Save Parameters button, described above), use this option to load those saved parameters again. Select the parameters you want to use from the list; then select Load. Note that the list will be empty if no parameters have been saved.
Prescription History Details
Select Web Client > Report Dashboard > Prescription History > Run Report > select (double-click) Patient History entry

Prescription History Details
NOTE: Selecting the View XML button on the action bar will display the XML message associated with the message selected. This button is available only once an Electronic Prescription has been selected.
Prescription History Report Example - PDF
After selecting PDF, the report generates in PDF format.
Select Web Client > Report Dashboard > Prescription History > Run Report > PDF
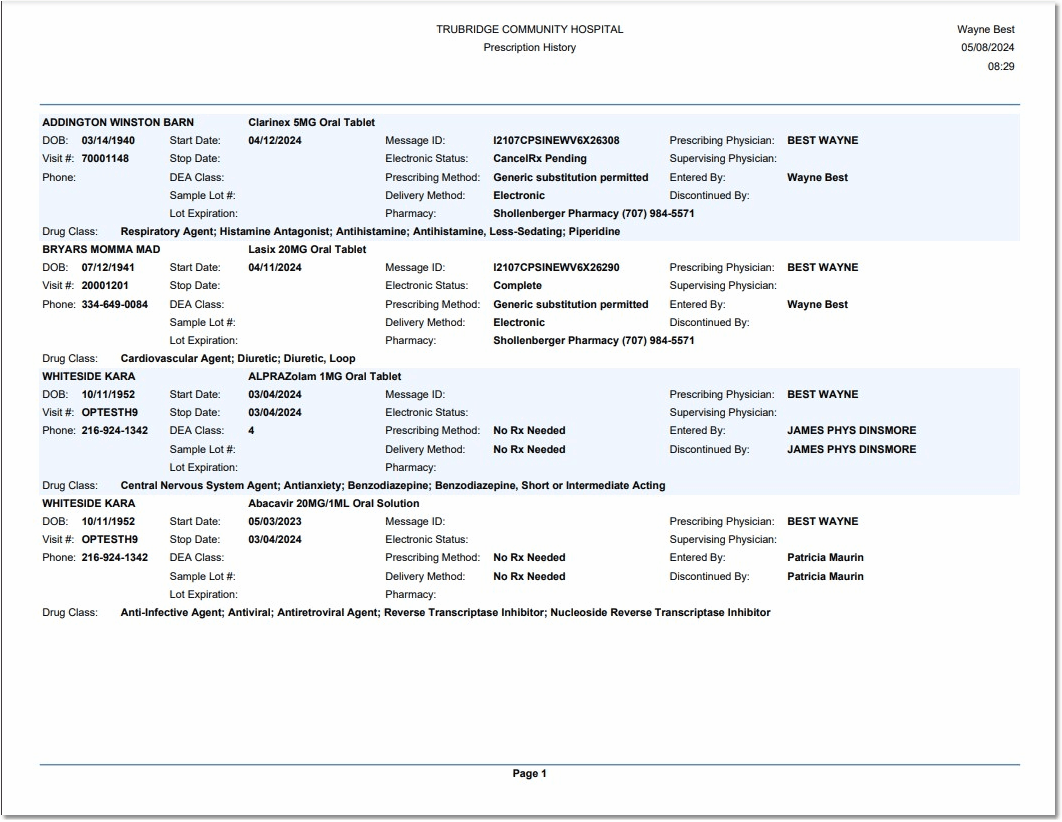
Prescription History PDF
Prescription History Report Example - CSV
After selecting CSV, the report generates in CSV format.
Select Web Client > Report Dashboard > Prescription History > Run Report > CSV

Prescription History CSV