|
<< Click to Display Table of Contents >> Creating Custom Filters |
  
|
|
<< Click to Display Table of Contents >> Creating Custom Filters |
|
The Customize option on the action bar allows users to create custom filters and then select the filters that will be used to delimit the tracking board when My Custom is selected.

Tracking Board - Action Bar and Filters
To Apply Custom Filters
1.Select Customize.
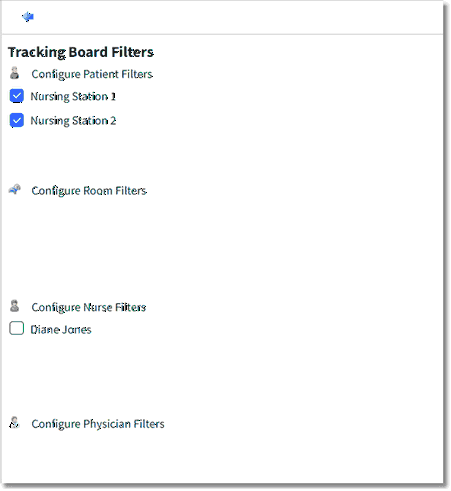
2.Previously selected filters will display. Select (check or uncheck) the filters to be included in the custom filter and then select the blue back arrow.
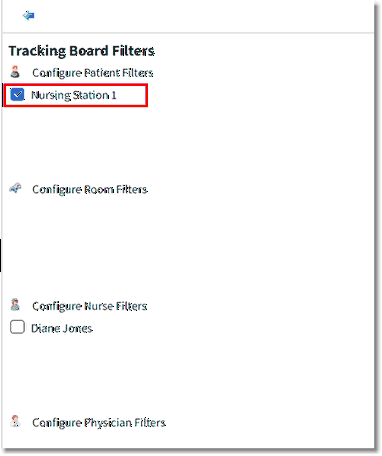
Tracking Board Filters
3.To view the custom filter, select My Custom.
To Add a New Filter
1.Select Customize.
2.On the Tracking Board Filters screen, select the appropriate configuration filter option. Options are Configure Patient Filters, Configure Room Filters, Configure Nurse Filters, and Configure Physician Filters.
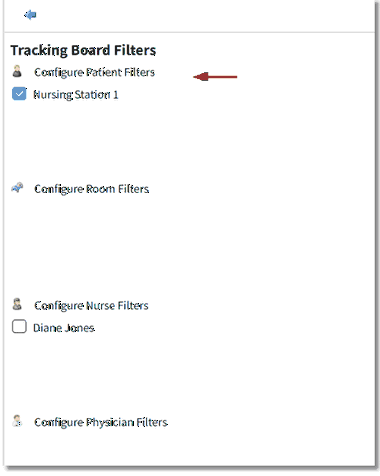
Tracking Board Filters
3.The selected Tracking Board Filters screen displays. Any previously added filters will display. These filters can be edited, removed, and set to checked or unchecked. To create a new filter, select Add.
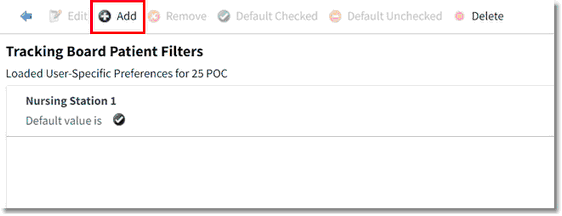
Tracking Board Filters - Add
4.A list of available filters may display. The list may include other user-created filters or system default filters. If the desired filter is not listed, select New.
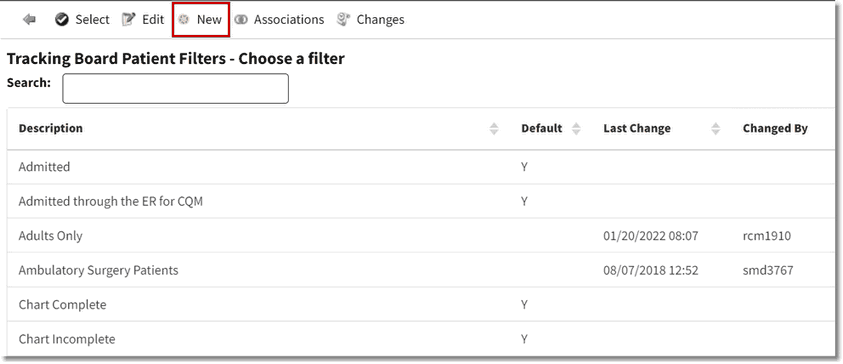
Tracking Board Filters - Choose a Filter
5.To specify a title for the filter, select (Filter Title).
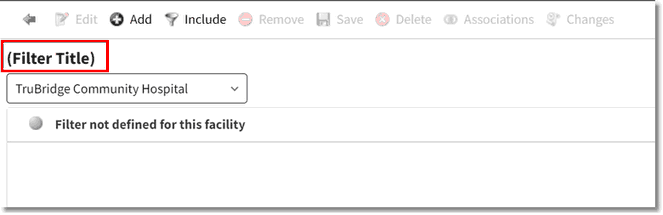
Filter Title
6.Enter the filter title and select OK.
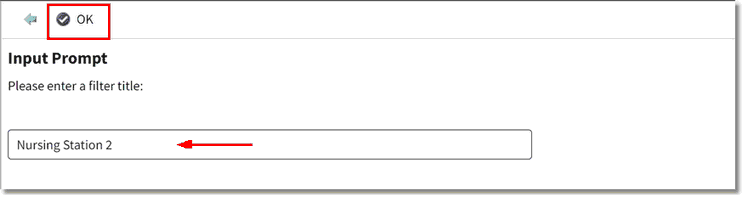
Enter Title
7.The filter title displays on the screen. To create the filter, select Add.
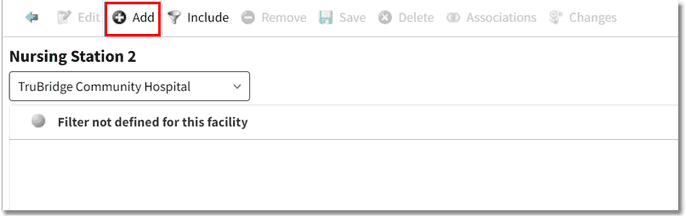
Custom Filter - Add
8.A list of database field descriptions displays based on the configuration filter selected. Use the Search option to locate the desired filter description. Once you locate the description, double-click on the entry or select the description and select OK.
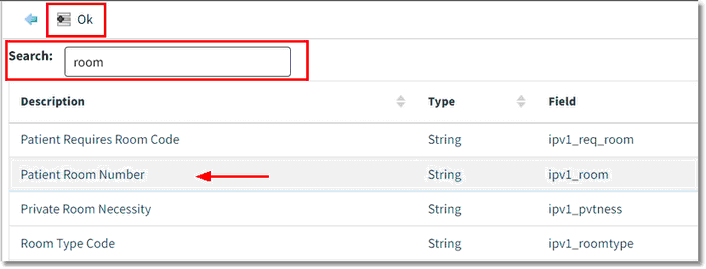
Database Description - Selection
9.The filter configuration options display. Double-click on the desired option.
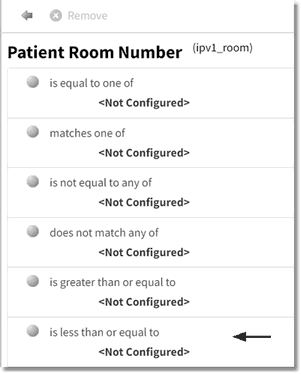
Filter Configuration - Selection
10. Enter the appropriate value in the Enter Value(s) field and select Enter on the keyboard. This is a free text field and will allow the input of values specific to the facility.
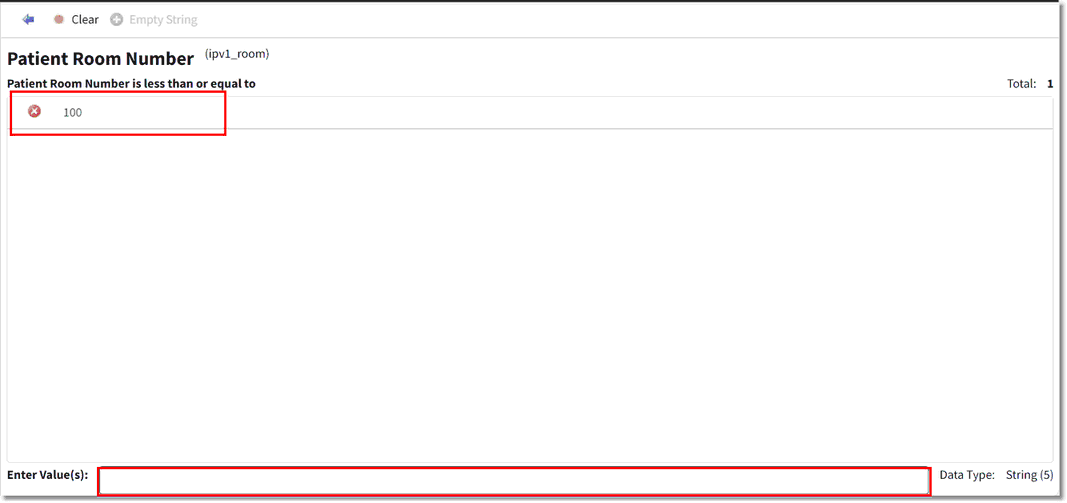
Value(s) Entry
11. Select the blue back arrow to return to the filter configuration screen. If additional configuration is needed, repeat Steps 9 through 11. If no other configuration is needed, select the blue back arrow again.
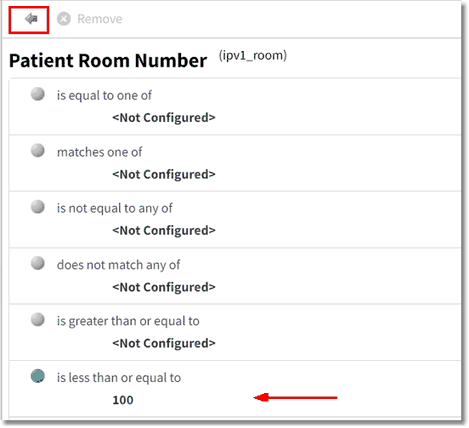
Filter Configuration
12.The filter details display. Filter methods are located at the bottom of the screen to choose between data matching ANY or ALL of the selected criteria. Select Save to save the filter and then select the blue back arrow.

New Filter - Save
13.On the Tracking Board Filters - Choose a filter screen, use the Search option to locate the new filter. Once you locate the filter, double-click it or select the filter and select Select.
Tracking Board - Choose Filter
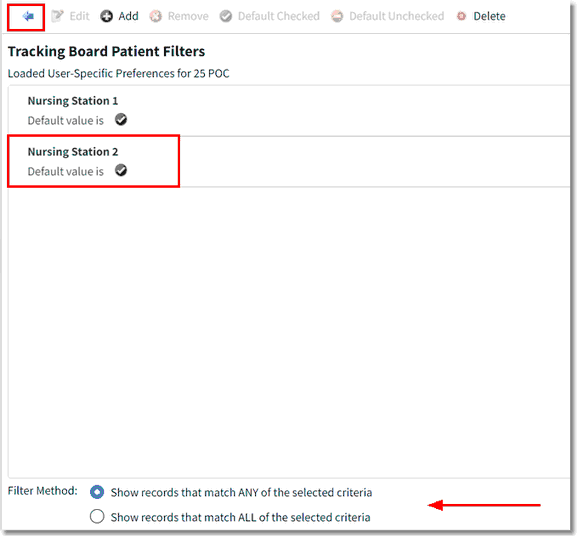
14.The new filter displays and is checked by default. The bottom of the screen provides options to choose between data matching ANY or ALL of the selected criteria. Make the appropriate selection and select the blue back arrow.
NOTE: A filter can be unchecked by selecting Default Unchecked or checked by selecting Default Checked.
Tracking Board - New Filter
15.The Tracking Board Filters screen displays. All the selected (checked) filters on this screen will be applied when My Custom is selected. Check or uncheck any filters that should not be applied.
Tracking Board Filters
16. Select the blue back arrow to return to the tracking board.
17.To view the custom filter, select My Custom.