|
<< Click to Display Table of Contents >> Rescheduling |
  
|
|
<< Click to Display Table of Contents >> Rescheduling |
|
To reschedule a patient, select the patient's name from the scheduling grid and then select ![]() Reschedule from the action bar.
Reschedule from the action bar.
NOTE: The Reschedule option will not be available to be selected until a patient is selected from the grid. If Reschedule is selected from the Day View schedule, the screen will then change to the Week View to select the new date and time.
NOTE: If the Location has any of the 'Prompt For Reason' options selected in the Locations table, the Select Reason Code screen may display. If this screen displays, select a reason as to why the appointment is being rescheduled.
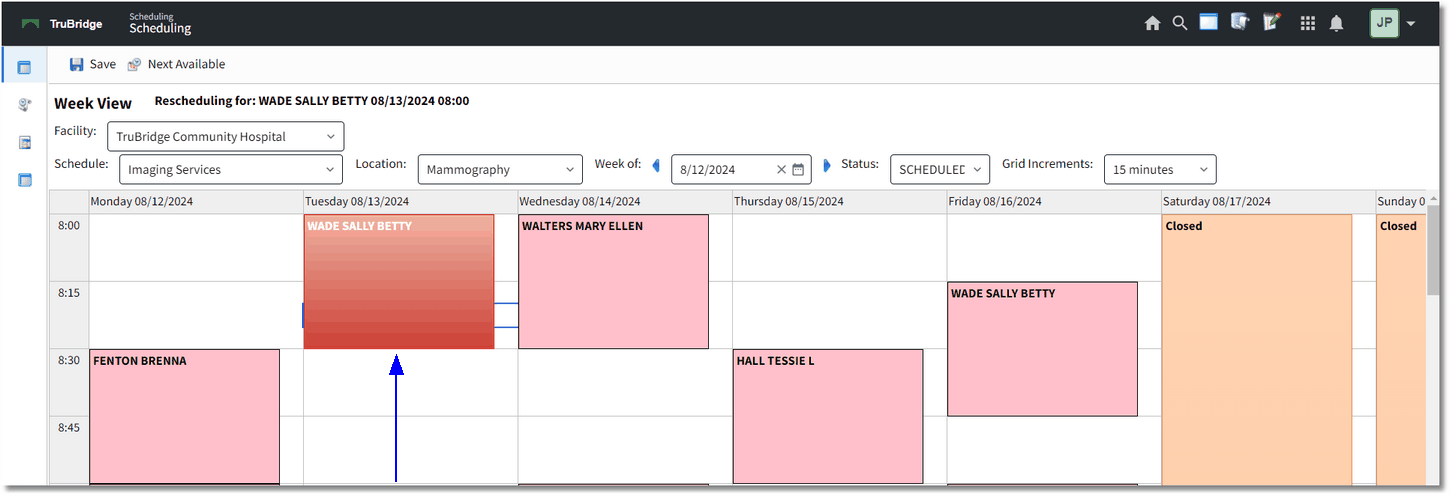
The patient's slot on the grid will turn red indicating it has been selected for rescheduling. The top of the screen will also indicate the patient that has been selected for rescheduling.
Select Web Client > Scheduling > Select Appointment > Reschedule
Rescheduling
The Schedule, resource and date may be changed as necessary to reschedule for the right place and time. Once a new date and time have been decided, select the appropriate slot on the grid, and select ![]() Save from the action bar.
Save from the action bar.
NOTE: If the resource needs to be changed, the Locations drop-down will only include resources that are associated with the task being rescheduled.
NOTE: If a new cell is not selected and Save is selected, the patient will remain in the original appointment slot. If a destination cell is chosen, and the rescheduling process needs to be canceled, the original slot must be selected. Select Save from the action bar.
The original scheduled slot on the grid will be emptied, and the patient will now display on the grid in the new scheduled date and time.