|
<< Click to Display Table of Contents >> Pre-Certification |
  
|
|
<< Click to Display Table of Contents >> Pre-Certification |
|
Pre-certification information may be entered for a patient's visit if table setup has been completed. Each task will need to define which financial classes will need to capture pre-certification information in the Tasks/Procedures table. When a patient is scheduled for the task, the patient must have a financial class that matches one for the task being scheduled. For more information on how to define financial classes for a task, please see the Precert section.
To begin entering pre-certification information when scheduling a patient, complete the necessary information on the Event screen and then select ![]() Update.
Update.
NOTE: the Pre-Certification option on the action bar of the Event screen will not be enabled until the Event screen has been exited and then reaccessed.
The Pre-Certification screen will display information for the primary, secondary and tertiary insurances. The Contract Number and Social Security Number will auto-populate from the Insurance Policy Information screen. The remaining fields will need to be manually entered with any necessary information for the pre-certification. Once all information is entered, select ![]() Save on the action bar. Then, select the back arrow to exit the screen.
Save on the action bar. Then, select the back arrow to exit the screen.
Select Web Client > Scheduling > Select Date and Time > Select Patient > Select Task > Update > Pre-Certification
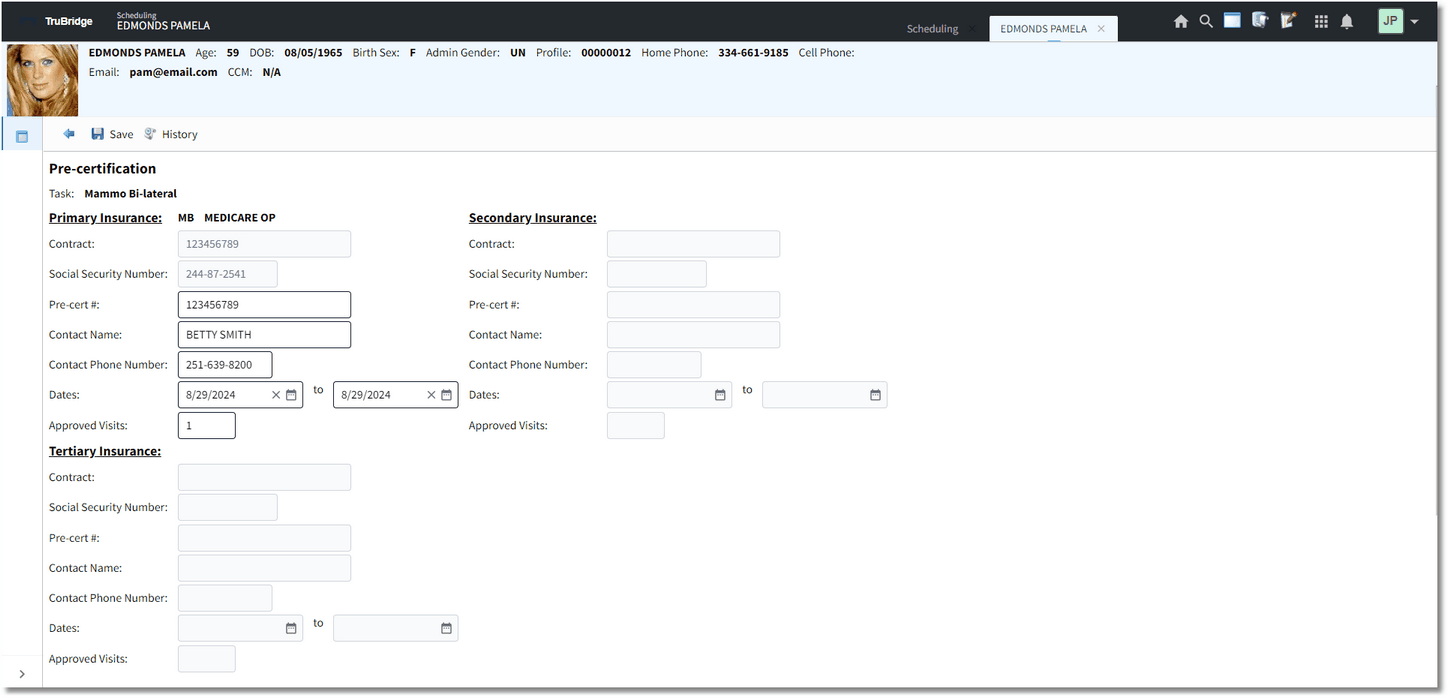
Pre-Certification Screen
When populating a pre-certification number for an appointment, this will update the Insurance System - Policy Information screen of the patient account to which the appointment is linked. For more information on how to link a visit to an appointment, please see the How to Link a Registered Account to the Schedule section.