|
<< Click to Display Table of Contents >> Problem List Action Buttons |
  
|
|
<< Click to Display Table of Contents >> Problem List Action Buttons |
|
The Problem Display screen has multiple options on the action bar:
Select Whiteboard List > Patient > Problem List

Problem List Action Bar
The Problem Display screen allows for multi-select functionality. More than one entry may be selected prior to selecting options on the action bar such as Address, Deselect All, and Include in Medical History.
•New Problem will launch to the Problem Detail screen and allow the user to document a new problem on the patient.
•No Active Problem should be selected in the instance that the patient has no active problems to document for the current visit. Selecting No Active Problem, serves as a recorded entry that the Physician Problem List for the patient's current visit has been addressed. This will count toward Meaningful Use.
•Edit will become enabled when a problem entry has been selected and will launch the Problem Detail screen for that particular entry. The screen may also be accessed by double-clicking upon the entry.
•Change Description will become enabled when a problem entry has been selected and will launch the Diagnosis List- New Problem screen so that another description and associated codes may be selected. Note that the original entry will remain in the History of the current entry.
•Address will become enabled when one or more problem entries have been selected. Once this option is selected, the problem entry will reflect the current date as the new addressed date.
•Select All will select all problem entries currently listed and the Address and Include in Medical History options will become enabled. These options may be selected to apply to ALL selected entries.
•Include in Medical History will become enabled when a problem entry(s) is selected or when Select All is selected. When this option is chosen, any selected entries will be appear under Medical History within the Health History application. Problems added directly to Medical History via the Health History application will appear under Inactive on the Problem List. The status may be changed to active, if desired.
•Print Problem List allows the user to define a time range to search for the patient's documented problems. Select Print Problem List and enter a start date and an end date for which the problems are to be printed. Select OK, then right click on the document in order to print.
The user can print the problem list entries by selecting Print Problem List by entering a date range and selecting Print. If Print Problem List is selected, a "Print" action will be written to the Patient Audit Log Report.
Select Whiteboard List > Patient > Problem List > Print Problem List
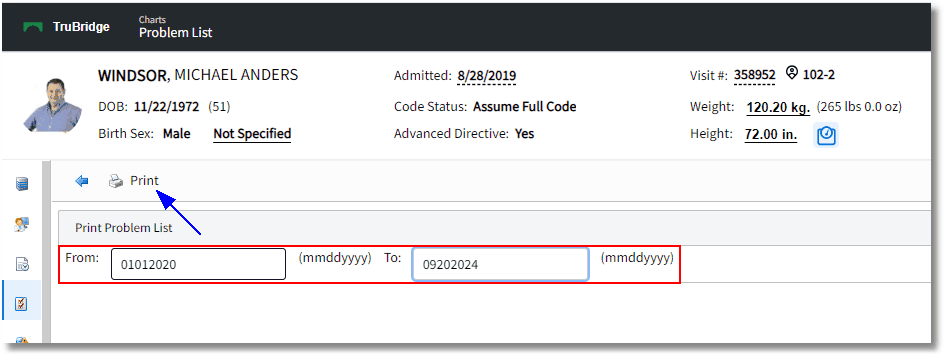
Print Problem List
To print a copy of the report, select Export. To return to the Problem Display screen, select the blue back arrow
Select Whiteboard List > Patient > Problem List > Print Problem List
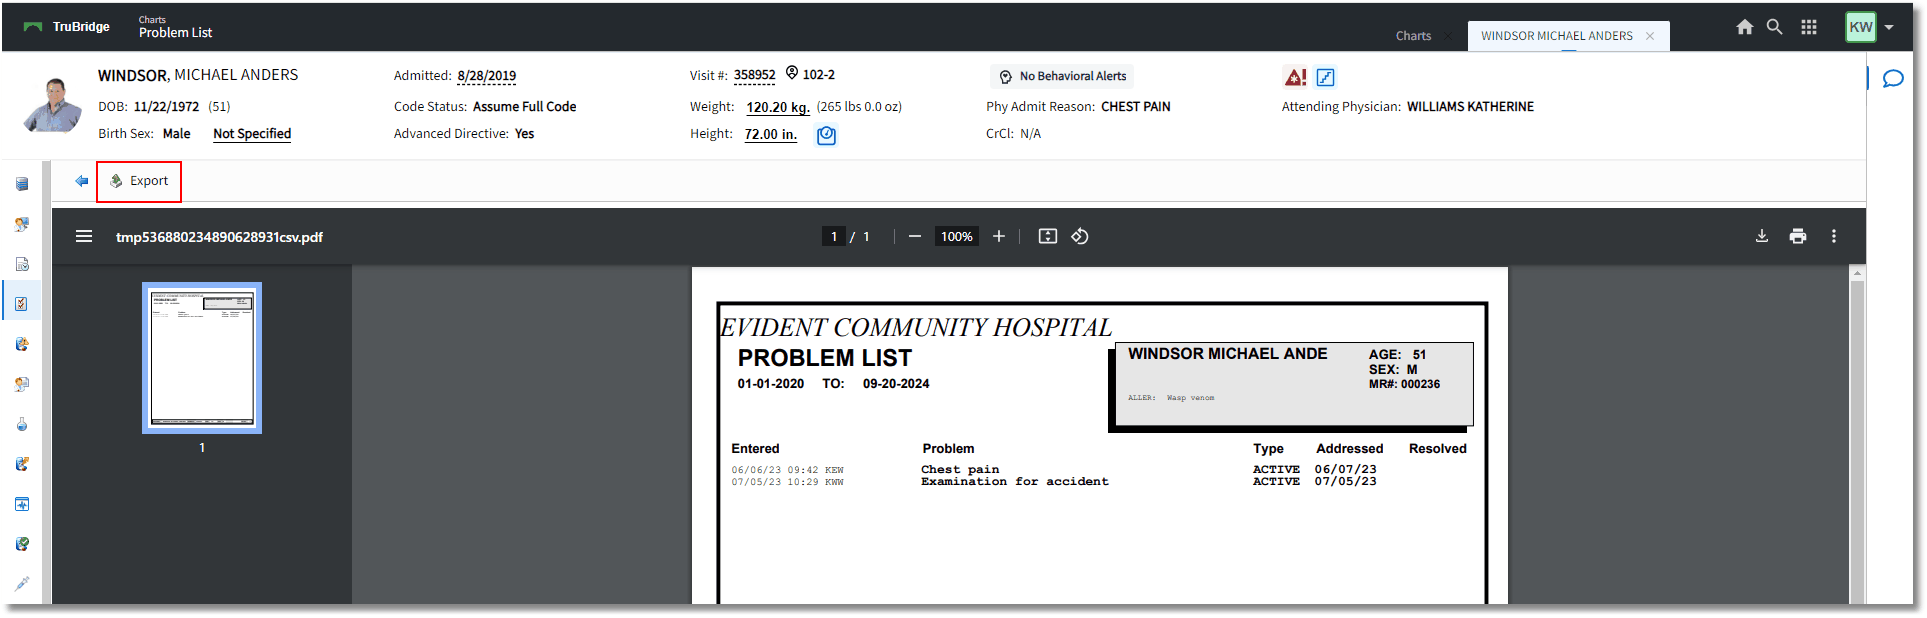
Problem List Report
The Patient Audit Log will reflect the printing of the Problem List report as seen below. The column headers for the report are: Login, Timestamp, Visit Number, Patient ID (number), Action, Program (screen) name, and a Description of the data accessed in the entry written to the patlog.
Select Web Client > Application Drawer > Reports > Patient Audit Log > Run > enter criteria > Run Report

Patient Audit Log