|
<< Click to Display Table of Contents >> Accessing Future Order Entry |
  
|
|
<< Click to Display Table of Contents >> Accessing Future Order Entry |
|
The process of entering Future Orders is the same between different clinical roles. The options available from the List Type will be the same as traditional Order Entry, including Departments, Order Sets, Order Lists, and Physicians (for provider-specific Order Lists).
Access the patient's chart from the Tracking Board or Whiteboard List and select the Order Entry application. Then select the Future Orders option from the action bar.
Select Web Client > Whiteboard List or Tracking Board > Select Patient > Order Entry > Future Orders
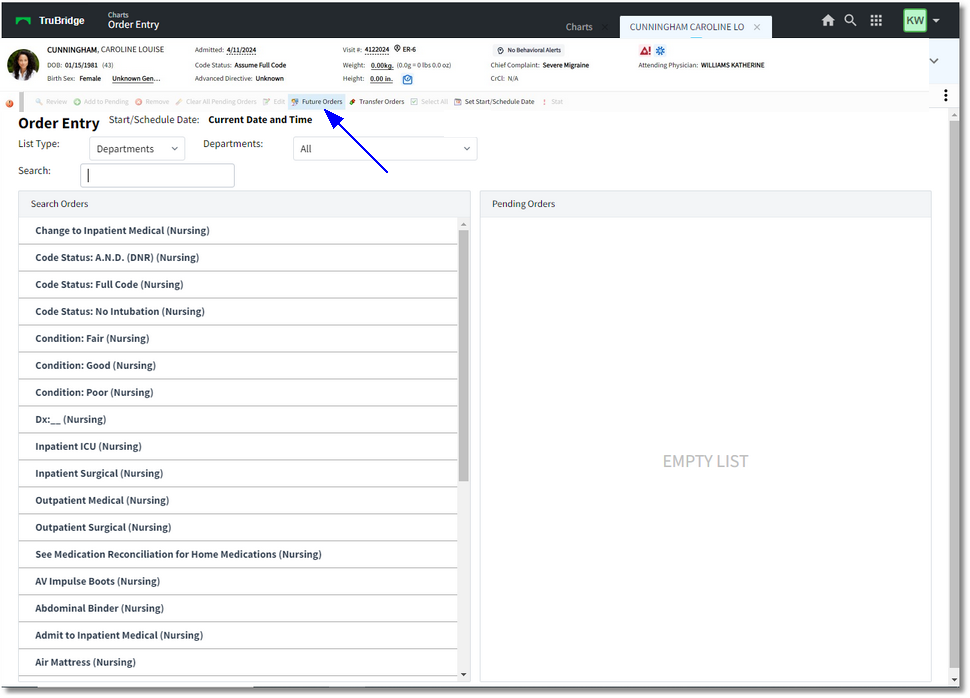
Future Orders Button in Order Entry
If the user's login has access to more than one facility, selecting Future Orders takes the user to the Facility selection screen. Once the facility is selected, the Patient Registration screen is displayed. This screen displays the patient's Name, Gender, Birth Date, Social Security #, and the Provider name. Notes may be added, if desired. Select Next to confirm the information and enter the Future Order Entry screen.
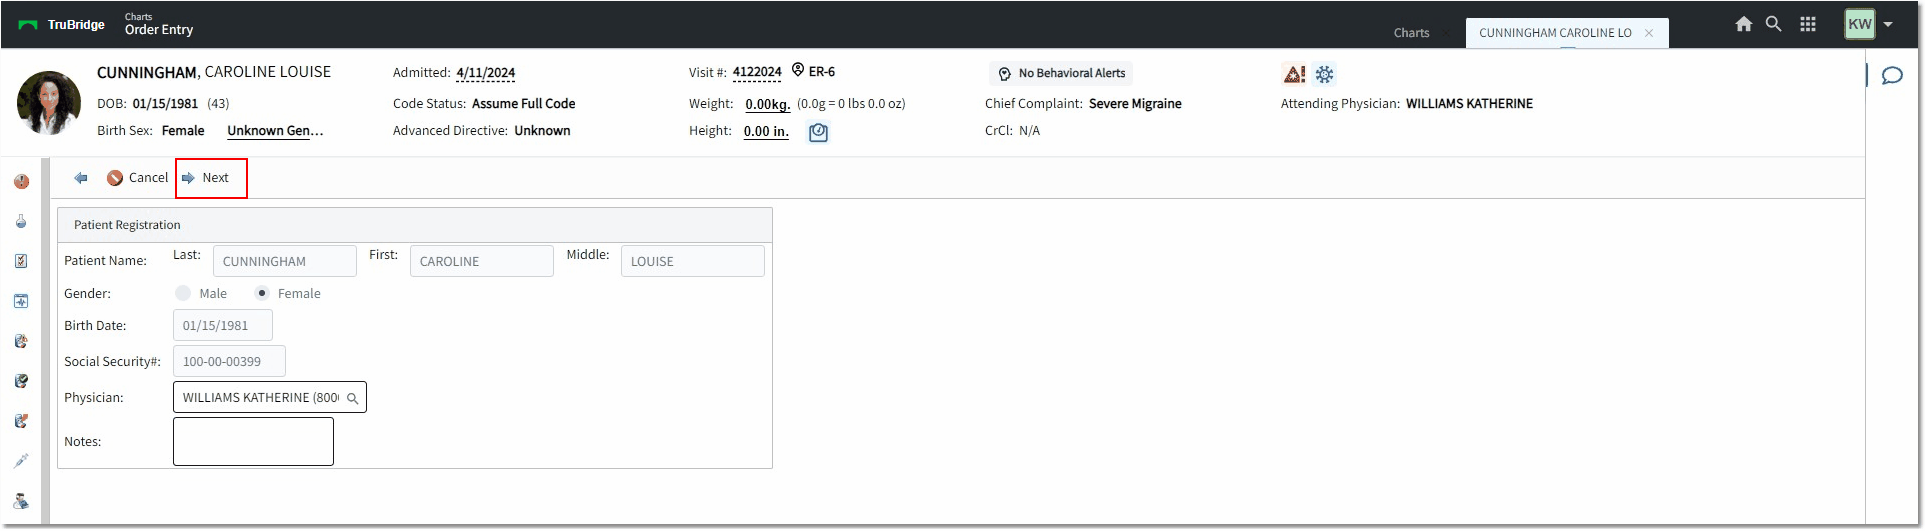
Order Entry - Patient Registration
The following options appear on the action bar:
•Review: Directs the user to the Pending Future Order Review screen.
•Add to Pending: When items are selected in Search Orders box, this option will add the items to Pending Orders.
•Remove: Deletes any selected pending orders.
•Clear All Pending: Deletes ALL pending orders.
•Edit: Accesses the Edit screen for any selected item(s).
•Select All: If an Order List or Set is selected, all items may be checked by choosing Select All. If selected, the option will change to Deselect All.
•Change Start/Schedule Date: Opens the same screen as the Set Start/Schedule date to set selected items to a specific date and time.
•Stat: Changes the selected items in Pending Orders to STAT orders.
•Order Reason: The description, ICD-10, and SNOMED code representing the reason for the order.
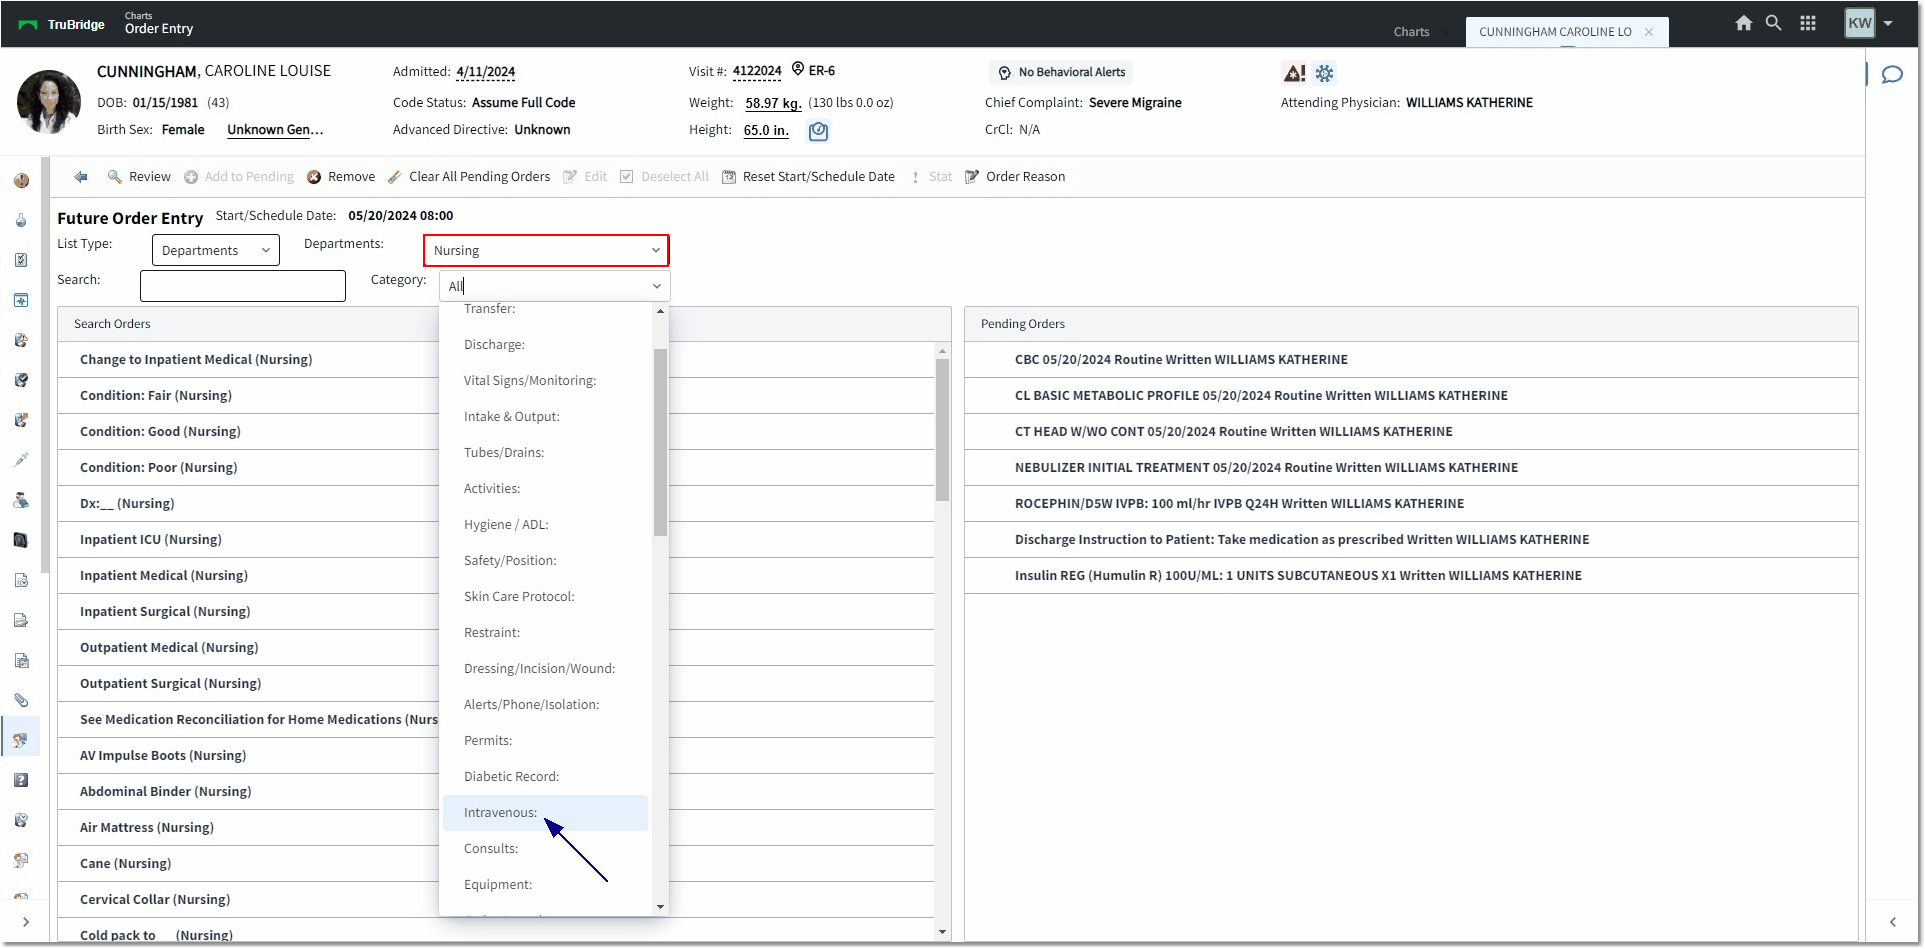
Future Order Entry