|
<< Click to Display Table of Contents >> Temporary Registration |
  
|
|
<< Click to Display Table of Contents >> Temporary Registration |
|
Temporary Registration is a quick and temporary way to get a patient visit added. These patient visits need full registration to be completed at a later time, making them permanent registrations. This option should be used with caution and per the hospital's policies. (NOTE: Policy and procedures will need to be established to determine how and when providers should use this option.)
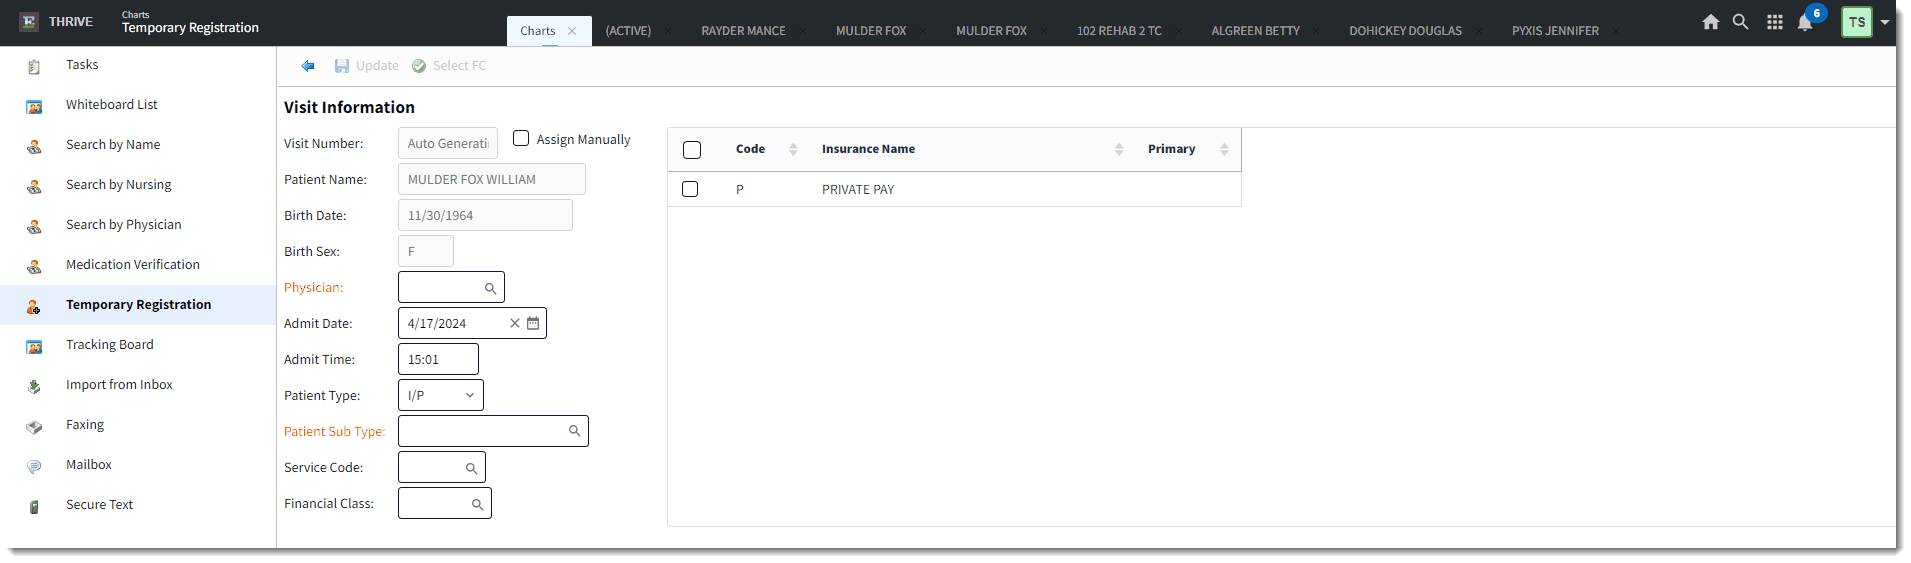
1.Go to Charts > Temporary Registration.
2.In the Patient Name field, type the last name of the patient. Matches are displayed. Double-click to select the appropriate patient to display available visits. If the visit you are looking for is not listed, select New Visit. The Visit Information screen is displayed with available fields pre-populated, such as the Patient Name, Birth Date, and Birth Sex.
NOTE: If needing to create a temporary registration for a patient who has not been to the facility before, select New Profile and complete the information there first, and then a temporary registration may be created by selecting New Visit.
Temporary Registration
3.Review or edit the fields on this screen as appropriate.
•Visit Number: The visit number will default to Auto Generating. Selecting the Assign Manually check box to the right of the Visit Number field will make the Visit Number field accessible so that the visit number may be manually assigned.
•Patient Name: This is the patient's name as it appears on the Patient Profile screen.
•Birth Date: This is the patient's date of birth as it appears on the Patient Profile screen. NOTE: The Birth Date and Admit Date fields may be entered in DD/MM/YYYY or DD/MM/YY format.
•Birth Sex: This is the patient's gender as it appears on the Patient Profile screen.
•Physician: The user must select the attending physician from the physician look-up. If a physician is not selected, the prompt "Can't save. Please enter a valid Physician number" will display.
•Admit Date: This field will automatically pull the current time as the admit date when the temporary registration is created. This field may be changed if needed. NOTE: The Birth Date and Admit Date fields may be entered in DD/MM/YYYY or DD/MM/YY format.
•Admit Time: This field will automatically pull the current time as the admit time when the temporary registration is created. This field may be changed if needed.
•Patient Type: This field will default to ER, but may be changed from the drop-down menu.
•Patient Sub Type: Select the sub type from the drop-down list, if applicable.
•Service Code: The service code field may be edited by entering the desired service code or selecting the magnifying glass icon to open a look-up menu for service codes. Double-click the desired service code to add it to the Visit Information screen.
•Financial Class: Select the appropriate insurance coverage(s) from the insurance list that displays on the right, then choose Select FC from the action bar. Multiple insurance coverages may be selected by holding down the <Ctrl> key on the keyboard while selecting with the mouse. Choose Select FC, or select each insurance coverage separately and choose Select FC after each selection. If the desired insurance coverage is not listed or there are not any insurance coverages listed, select the magnifying glass icon to access the Insurance List screen. Highlight the desired insurance coverage(s) and select OK.
4.Select the Physician and Patient Sub Type.
5.Select Update. The system will create a Temporary Visit, and the Guarantor listed on the patient's profile will copy over as the Guarantor for the visit.
NOTE: When the system creates the Temporary Visit, it will appear on the Exceptions Report if services were rendered. If the Temporary Visit has a zero dollar balance, it will appear on the Incomplete Register report.
Additional Resources: Person Profile and Registration Guide and Temporary Registration Guide.