|
<< Click to Display Table of Contents >> Overview |
  
|
|
<< Click to Display Table of Contents >> Overview |
|
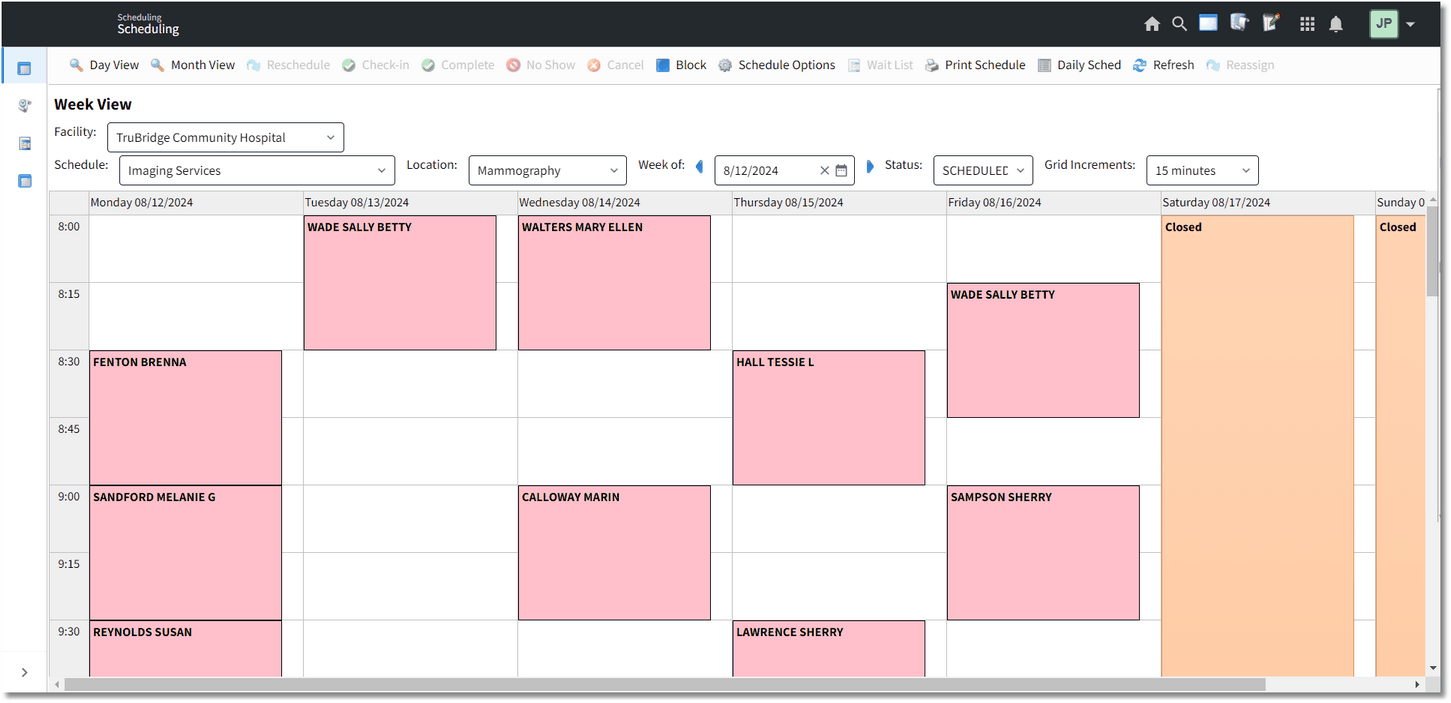
Once the Scheduling application is accessed, the screen will display the scheduling grid for the schedule set to default in Schedule Options. The locations will display in the order they were added to the schedule. The week will default to the current week, and the status will default to Scheduled but may be changed to All, Completed, Canceled or No Show.
The Grid Increments drop-down will allow the time increments to be changed on the scheduling grid. The scheduling grid will always default to the increment setting for the schedule, but may be changed as needed.
NOTE: The Grid Increments option is only available on the Day and Week View schedules.
Select Web Client > Scheduling
Appointment Scheduling
The Facility will default to the facility the user is currently logged on to. Select the drop-down to select a different facility for which to schedule.
Scheduled patients names will display on the scheduling grid and the grid cell will be shaded for the amount of time the task has been set up for.
Hovering over any of the shaded grid cells will display a pop-up with some of the patient's information. This information may be customized for each schedule. Please refer to the Hover Maintenance section of this user guide for information on how to customize.
NOTE: When a patient is scheduled for the same date and time as an existing appointment for the same location, a message will display which states "Warning: Patient currently scheduled for this date/time. Do you wish to schedule anyway?" When this prompt is answered "Yes," the appointment will be scheduled. When the prompt is answered "No," the appointment will remain Unscheduled and may be addressed at a later time. In order to use this feature, the "Overbook Appointments" Scheduling Behavior Control will need to be set to Allow.